Thread #1017490 | Image & Video Expansion | Click to Play

What's the quickest way from retard to creator of this?
Wing3D?
62 RepliesView Thread
 Showing all 62 replies.
>>
File: F7_OzmJXUAEmR6p.jpg (67.6 KB)

67.6 KB JPG
>>1017490
>>
>>
>>
>>
File: download.png (90.4 KB)
90.4 KB PNG
>>1017490
not sure why you'd use wings over blender considering the latter has a bigger community and more tutorials out there, but it's your choice
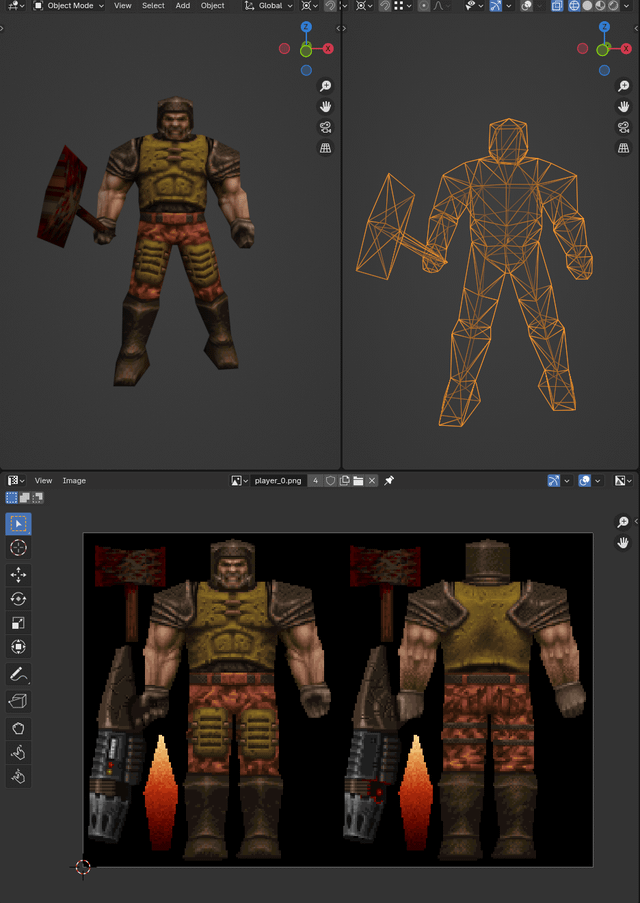
I think I've seen one other game use this flat texturing method, can't remember what it was
if you look at the model, they made it so all the faces are facing the front or back of the camera so there's minimal stretching at the sides. after that they used the Project From View unwrap method and then likely painted over the UVs in their texture editor of choice
for something like the hammer which would be perpendicular to the camera they'd just Project From View at whatever side would have the most space, in this case the side
the main thing you need is a good understanding of silhouette and the ability to texture paint
here's a nice little piece on the PS1 / Quake-era aesthetic:
https://www.tumblr.com/spellfist-3d/615902900826390528/guide-to-that-e lusive-ps1-pixelated-lowpolybut
you can take a closer look at the Quake models and textures here:
https://models.spriters-resource.com/ms_dos/quake/
https://textures.spriters-resource.com/ms_dos/quake/
if you want to get started with blender:
https://www.youtube.com/playlist?list=PL3GeP3YLZn5hhfaGRSmRia0OwPPMfJu 0V
https://www.youtube.com/playlist?list=PL3GeP3YLZn5gZhJhyIQPKoz9Yrs9oKU 9R
also check this thread out: >>992953
>>
>>1017503
>if you look at the model, they made it so all the faces are facing the front or back of the camera so there's minimal stretching at the sides.
Unironically how do you plan this?
Do you like try to have only a single edge going on the sides? Do you pose it in some fashion before projecting UVs?
>>
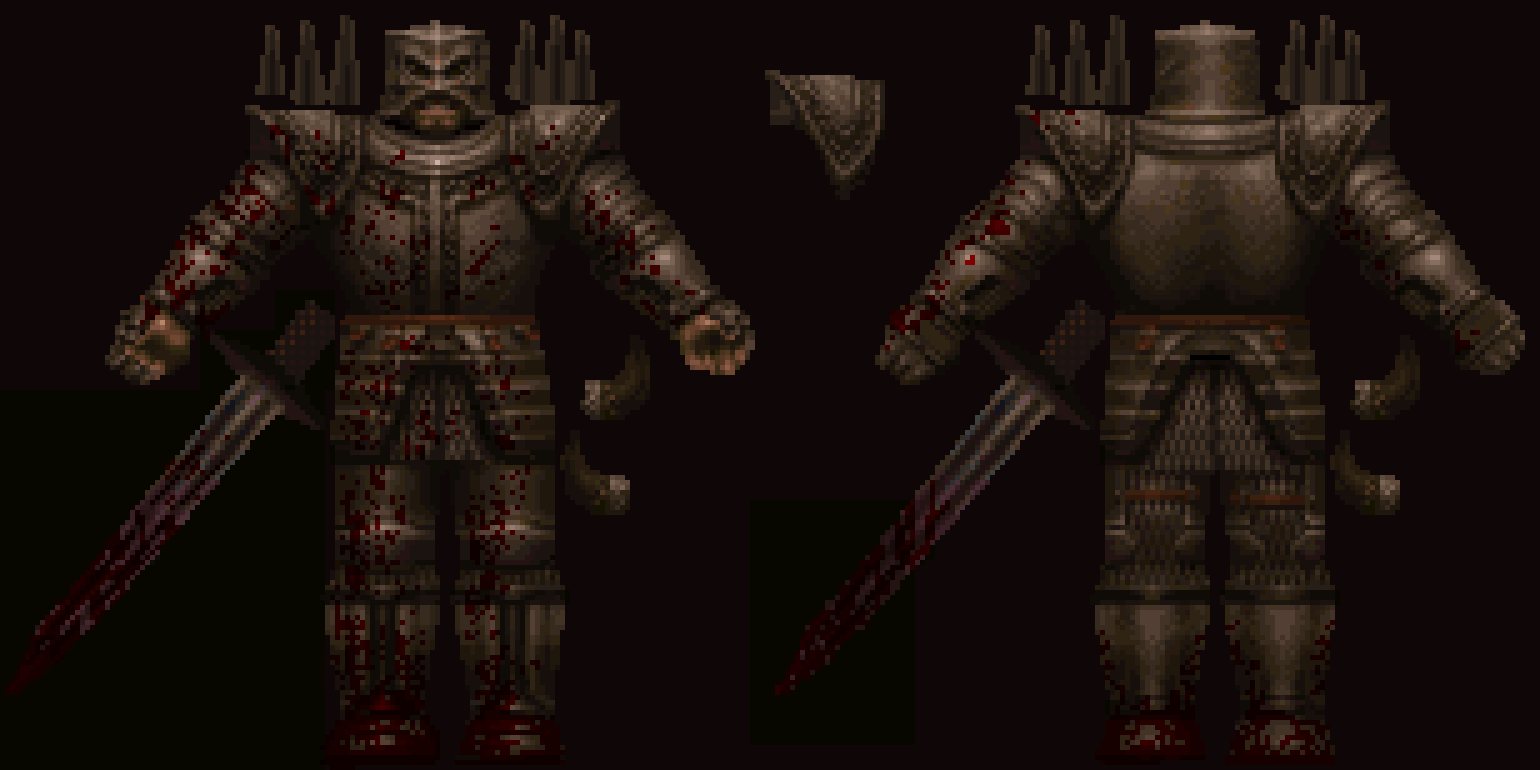
File: 555.png (1.5 MB)

1.5 MB PNG
>>1017505
>have only a single edge going on the sides
looking at the models, it seems that way yeah
in terms of posing I imagine they tried to pose it in a way that you can see the most faces / largest surface area
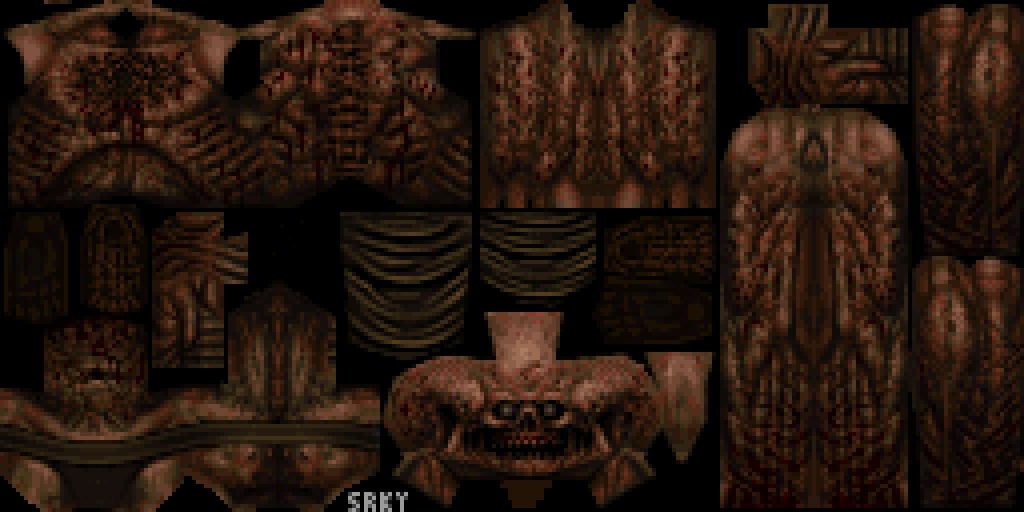
in the knight texture you can see that the arms are turned out to the front so you can see the bicep / ticep area as well as the palms and back of the hand, rather than facing the side as they normally would when resting
if you use segmented limbs unlike Quake then the posing will be even easier since you won't have to mess with the mesh itself, just rotate it as you want it projected to texture on
>>
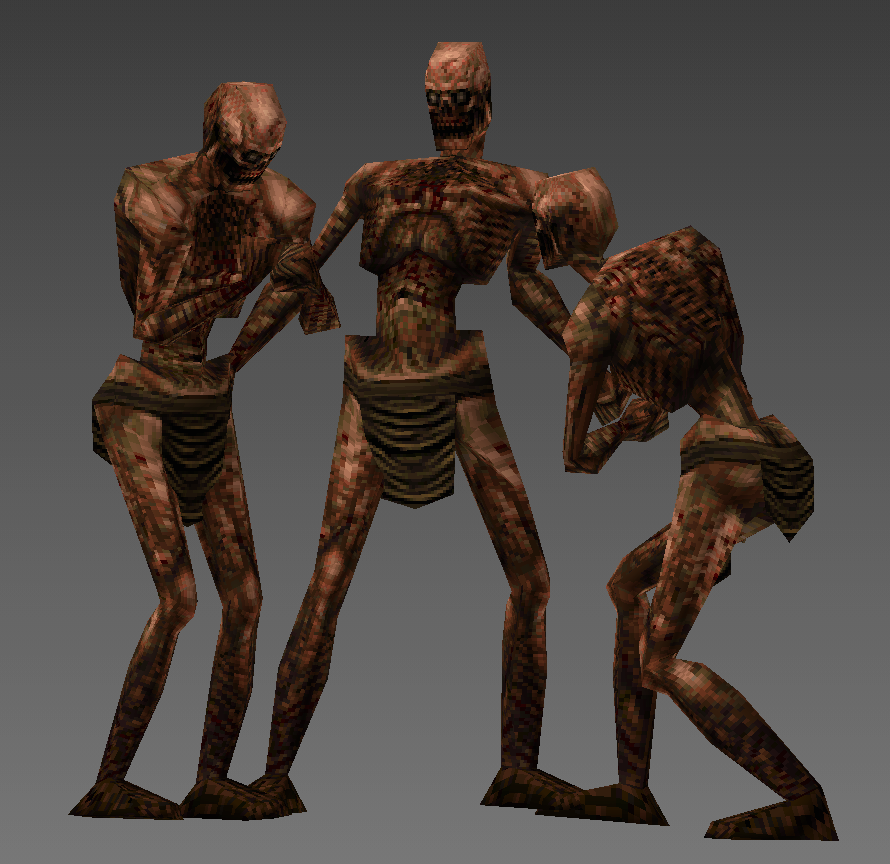
File: MS-DOS - Quake - Shambler.png (14.6 KB)

14.6 KB PNG
>>1017507
another example with the shambler here, with the way its hands are spread out for the purpose of texturing
>>
>>
>>
File: MS-DOS - Quake - Dog.png (14.9 KB)

14.9 KB PNG
>>1017511
this texture shows that too, looks very odd
>>
>>
>>
File: q.png (802.7 KB)

802.7 KB PNG
>>1017503
same poster, I gave this style a quick test, seems easy enough
also if the character is mirrored like the knight or the shambler you could split the texture / UV in half for optimization
I can't texture paint for shit though sadly. this method is definitely best suited for competent 2D artists, although I guess it could just as easily be used for other less realistic methods of texturing, it's very easy and straight-forward
>>
>>1017526
also for anyone interested in trying it out, some tips:
use blender's built-in texture painting to crudely draw the landmarks on the model, then take it into something like photoshop to finish. it's easier than guessing how exactly the parts will line up at the seams and such
export the UV layout to 2560x2560 or whatever fits nicely into a multiple of whatever your target res is, like 128x128 or w/e. it's just easier to paint in higher res and then lower it in photoshop (use bicubic sharper)
also don't forget to index the texture to 256 colors. you can find the Quake palette online and index it to that if you want to be fully authentic to that style
>>
>>
>>
>>
>>
>>1017490
Wings wha?
Low poly models favor texturing more than ANYTHING.
So you should start with being able to set up your texture sheet first.
The pic you provided doesn't even have side textures, just front and back so you can see texture stretching on the hammer.
There's a process deeper than the pic you provided too. That texture in picrel is the end process of building the model texture.
Each piece of material was preplanned.
The model is probably the least important aspect of low poly.
>>
>>
>>
>>
>>1017496
40 + anon here.
Played Q1 after installing it from 30+ diskettes downloading the demo on dail up from a college 100 miles away.
Anyway, I used to edit the (I think BMP but it might of been another format) files using software called DPAINT. The texture was unwrapped so it was a but of a shit show but it worked.
You can grab this shit on archive.org or abandonnia https://en.wikipedia.org/wiki/Deluxe_Paint
https://winworldpc.com/product/deluxepaint/2x
back when windows wasn't for faggots
>>

>>
>>1017871
According to the devlogs for Quake it was Adrian Carmack and Kevin Cloud who where the texture artists.
They painted everything by hand in Photoshop 2.5/3.0 running on SGI and Windows NT workstations.
There isn't anything magic or exotic to it but they restricted themselves to a 256 color palette
handled thru a custom tool written by John Carmack that handled that as well as saving to Quake's .wad format.
The colors chosen was a range they knew would help ask the texture seams.
Over at Epic it is stated it was Shane Caudle who painted nearly everything for the original Unreal.
He used 1996 Photostop 4.0 on a PC. He had custom tools that packed the textures into the .utx format and generated mipmaps.
He stated in interviews he painted his textures at higher resolution and downscaled to the res used by the game.
You can do anything they did back then better in standard photoshop of today.
If you wanna be early Quake 'Photoshop 2.5 authentic' just don't use any layers as you didn't have those until 1994 and 3.0
>>
>>
>>
>>
>>
>>1017879
it's the smartest and easiest way to do it and likely always will be; painting at 128x128 or 256x256 resolutions is a challenge because you can't get a clear read on values and what it is you're actually painting
>>
>>
>>1017879
>>1017885
Both Quake and Doom are ancient PBR, they're not pixelart. Proper way to do lowres PBR textures is to do highres (or even infiniteres, if you do it in node-based system as a composition of noise functions, distance fields, etc) PBR textures and downscale / render at target resolution. It doesn't work in true pixelart because there individual pixels encode complex features in implicit/implied stylized ways, and rich PBR texture detail don't work in pixelart because they muddy the abstraction pixelart heavily relies on.
>>
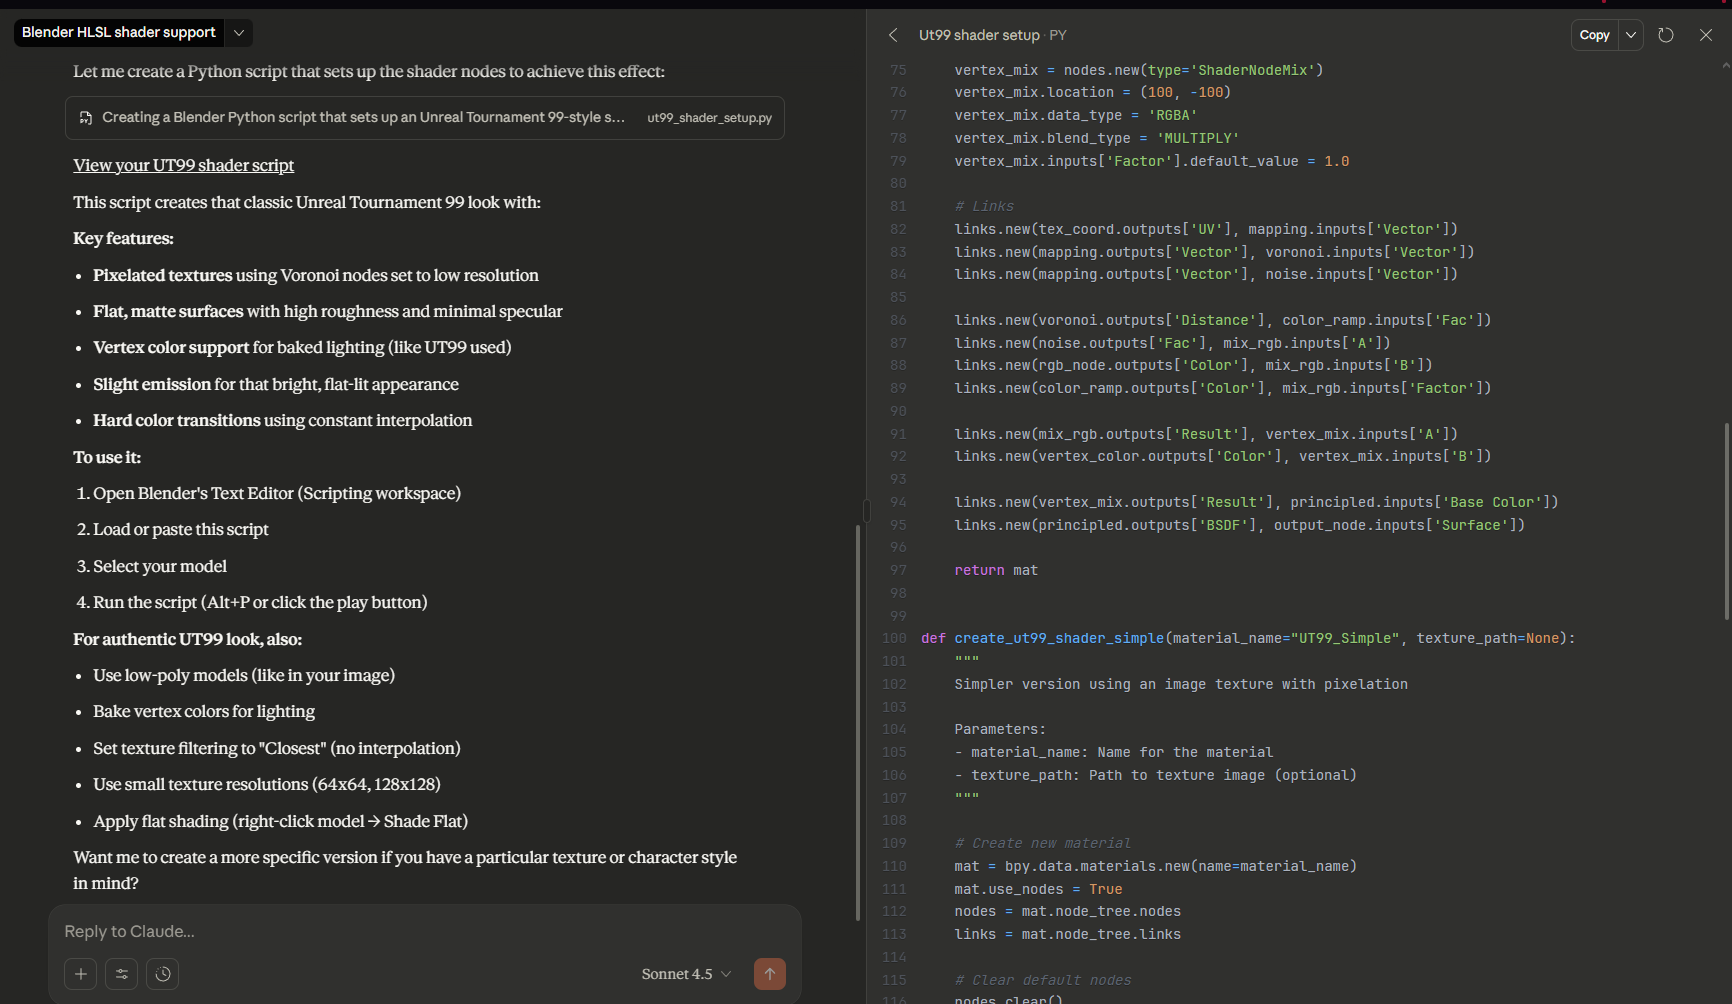
File: image_2025-10-24_121749246.png (319.5 KB)
319.5 KB PNG
I don't use blender but I started using claude.ai to shit me out shaders for unreal and I imagine it works much the same way for blender, so heres a python script and some basic instructions, ask grok or chatgpt if you have problems still
https://jumpshare.com/s/fwcE769dyldxUUOBfwe5
>>
https://youtu.be/kARj4ERXtQ8
https://filebin.net/mt5769kqey26m4h8
pirate substance painter and dl this (i bought it so you dont have to)
>>
>>
>>1020860
well it would take 5 minutes to figure out like it took me when I started using it, it gives you the product of what you would otherwise spend days fumbling around cobbling together with youtube videos
theres real answers already above but the keyword is easy
>>
>>1017544
At least wings3d was mentioned, it's a great minimal UI for focusing on making stuff, where the tools are hotkeyable, and is easy to configure, and save prefrences, editing blenders hotkeys is a nightmare because there's 8 modes of hotkeys worth Already defined and you gotta clean up all the ones overlapping ... Wings3d is simple allowing rapid use of the commands
>>
>>
>>
>>
>>
>>
>>
File: file.png (1020.4 KB)

1020.4 KB PNG
>>1017879
>He stated in interviews he painted his textures at higher resolution and downscaled to the res used by the game.
>this feels like blatant cheating
very old gdev here started in '98
downsample images is literally the trick to get authentic looking early 3d game textures
it feels like cheating because it's the secret.
back in the very old days gdevs had the best hardware so we could generally manage larger files than consumers
when people would try and replicate using asset size instead of source size they could never get results close,
some could get really good results like actual pixel artists but these are rare breeds.
a lot of us back in the day would use photos as a starting point.
those photos would be cut up or painted over to create the textures.
we'd either take them ourselves if our company allowed it
they would also buy CD libraries of photos and photo textures and multiple companies would use them. kind of like asset storefronts nowadays
one downsample step was in this using photos as a starting point step
you'd clip some part of a photo out and scale it to fit, then paint over it until you're done.
a lot of times we'd downsample the final texture again to fit on hardware/how it looked on a CRT, if it looked the same we'd use the smaller texture
some guys were so good at taking photos and turning them into textures you'd think they were hand painted or actual pixel art from the start
Idk if /3/ knows about ben but he's got a metric fuck ton of tutorials in the early '00 style
site: http://www.poopinmymouth.com/#tutorials
youtube: https://www.youtube.com/channel/UC5CEtTewnSFYw-sOZdm2D_g
if anyone else has other resources like this, please link them for others
>>
File: Kureca8.png (369.6 KB)
369.6 KB PNG
i came over this guy on twitter, creator in filename
>>
File: Kureca8 4.png (84.7 KB)

84.7 KB PNG
>>1022203
he painted a greyscale before coloring, wich i found interesting
>>
File: Kureca8 3.png (27.5 KB)
27.5 KB PNG
>>1022204
>>
>>1017490
5-10 years of digital painting knowledge for texturing and anatomy study. Modeling isn't the hard part, good textures are
>>1022196
Another "secret" is using correlated RGB noise (multiplying the values instead of purely additive) over the texture to add color variation. This effect is noticeable in some PS1 texture atlases
>>
>>
>>1022203
>>1022204
oh nice! it's called greybasing,
grayscale base and then later hue shifting
Create one grayscale texture, then color shift it for variations (rust, wood types, different metals)
This would often save tons of memory and you could get 5-10 textures from one base
>>1022206
oh great tip
>tiling micro details over unique macro
blend a tiling detail texture (noise, grain) over unique base textures during compositing. Breaks up repetition and adds depth.
we had a program that would take an input pattern a small texture with full black and white pixels similar to opacity maps
where it would tile the input pattern texture over your then you could apply various texture effects like noise, grain, hue shifts and other stuff.
it was really neat you could control where some effect would be placed and choose how it was applied, ie multiplied/additive etc
it was called cutout painter or something like that
some othjer good ones are
Vertex lighting baked into texture corners. pre lightmap era, you paint gradients into texture corners that aligned with vertex colors for fake ambient occlusion. made flat textures pop.
some games went with limited palettes which meant desaturating everything then you'd pushing it toward one hue. Not just quake brown, some games went green, blue-grey, even yellow, remember the yellow era? that makes inconsistent source photos more cohesive.
a metric fuck ton of what we had to do back then was dealing with limitations and finding ways over them.
>>
>>
>>

>>
>>
>>1017496
in the '90s? they probably wrote their own software (modelling/engine). the thing about the early days of something is that there just didn't initially exist suites to do this kind of work, at least not something a small studio could justify (few game studios had access to SGI hardware), it's why all the early 3d games are so different to one-another, they took different approaches, things didn't really settle until the early '00s once things converged into apis like opengl and direct3d, and licensed engines like ue1, goldsrc, quake3 and renderware
>>
>>1023304
on PC with the hype surrounding the 7th guest 3D Studio (pre-max) got really popular fast, but that was for prerendered stuff. It's not until Max (so 96) that you could see textures in the viewport, and even so you couldn't paint them for several years so yeah, devs wrote custom texture unwrap and preview tools and drew them in deluxe paint and later photoshop.
French game dev Cryo had famously developed an in-house real time 3d texturing tool that got leaked to every french dev and then some more across the world since it was so desirable.
>>
>>
>>1017490
for modeling you should take a model of whatever you want to copy and import it to blender (or whatever 3d modeling software you use) then add a mesh next to it and try to copy the model as closely as you can. If the result is too different then you try again a few more times until it looks similar enough. Then you make the model again, but this time change something about it. Do this again and again, changing the model each time, and eventually you'll be good enough at the style to make something in it.
>>