Thread #1017627 | Image & Video Expansion | Click to Play

File: 1750693155076413.png (2.1 MB)

2.1 MB PNG
Show us that cool new project you got in the works anon-kun!
Previous Thread: >>1014090
322 RepliesView Thread
 Showing all 322 replies.
>>
File: crowww.png (2.1 MB)

2.1 MB PNG
Crow, baby crow, egg, nest
>>

>>
>>
>>
>>
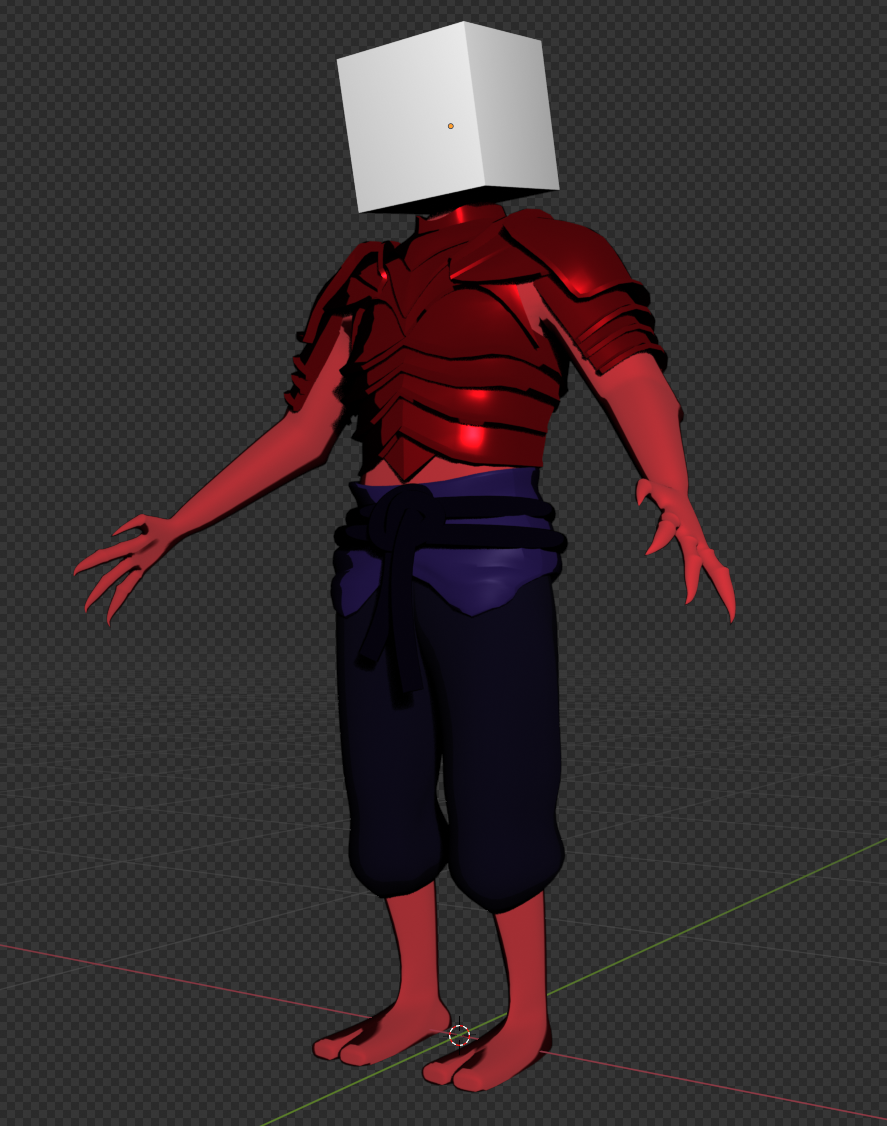
File: fash.png (958.6 KB)

958.6 KB PNG
Made a jacket, gloves and glasses
>>1017713
NTA but that's brutal, these are souls not even demons wanna slave over so they just get nailed on a cross for all of eternity? I wonder what kind of people they'd have to be, perhaps people so bland in life that demons would rather not have around, incapable of amusing their twisted sense of humor
>>
>>1017714
Yeah, that's the idea. Kinda like the filth from Ultrakill, just so dull and bland that they aren't even worthy to be maltreated slaves. Although, considering the job positions (holding up the throne of a 2000 pound demon, being dinner, being a public toilet, etc etc), getting your charred half-dead corpse nailed to a cross on a lava lake doesn't sound so bad by comparison.
>>
File: untitled.png (1.6 MB)

1.6 MB PNG
Started to block out an anime-style scene.
>>
>>
File: Arm System.webm (4 MB)

4 MB WEBM
>>1017698
here is the basic concept for it, instead of the tweak bones facing out, switch their direction so the tail its in the middle and then using 1 non-deform bone between the bicep and forearm that stretches and compresses i can get a compression scale for how close the forearm and the bicep are to each other, and then i copy that scale at various tiny amounts to the "tweak" bones to pull back the bones in the biceps/upper forearms, then using the same reference you can do x2 copy scales and isolate each axis to get compression on the X, and expansion on the Z to get the impression of the arm muscles working for example. then you need a second row of bones just slightly offset to counteract what the original arm bones are doing in some places. so as the original might expand on the X to bulge out the triceps, you might want to counter on the X on the inside to and compress for the deformation effect.
then in the pit of the elbow i have x3 bones at the point of the arm/forearm, 1 parented to the arm, 2nd to the forearm, 3rd parented to either one and then copies the transforms of the other to get an average again, and the "counter" bones mentioned earlier that are closest to the center will track to the 3rd bone. This 3rd bone will also get a copy scale from the middle compressing to pull in the counter bones, play with the copy transforms/scale influence to create the curve you want when the arm compresses, at 0.5 it will create a straight line. For this part I also split the 3rd bone in 2 parts, the bottom one will reverse the "pull" effect but will have a scale limit to stop it halfway until the top part retracts and folds in again, this is to create the effect of skinny arms where the pit will stretch out before collapsing.
the shoulder is simple for now, just a def bone pointing backwards to the collarbone/shoulder starting 1/4 of the way down the topmost arm bone, trying to make a mechanical clavicle now
I hope some of that made sense
>>

>>
>>1017767
oh and the elbow just copies the rotation of the 3rd bone but has a "flat" bone at the top because elbows are not pointy but create a flat "top" when stretched all the way, thats all that does by again copying the scale of the compression bone and isolated on the Y, bits on the end just point back to the either ends of the arm for smoothness
>>
File: jankleg.png (611.3 KB)

611.3 KB PNG
>>1017767
and the same system works for the legs of course
>>
>>
>>
File: FemboyWIP4CHIN.jpg (763.8 KB)

763.8 KB JPG
>>1017627
Ok OP, but remember, you asked to see it
>>
>>
File: boolets.png (767.2 KB)

767.2 KB PNG
Boolets.
Finding the actual dimensions for some of these was surprisingly difficult and at times I seriously questioned whether I had nailed the right ones and wasn't giving some of these cartridge types completely wrong proportions. If any /k/ommando sees anything off feel free to give me a shout, but I'm fairly certain they got the right sizes.
Also gadayum modeling the .50 BMG makes you realize how ridiculously huge they are, a fucking horsecock sized chunk of lead traveling at 1000m/s. Nutty.
It was also interesting to discover the 5.7 is like a mini 5.56, you know those bottleneck shaped bullets which are normally used for rifles. It's nice when a hobby makes you get further insight on the real world, it's educational
>>
File: untitled.jpg (132.7 KB)

132.7 KB JPG
>>1017721
Progress. I still am unsure about a lot of things of this scene, particularly i don't know how am i gonna shade the mid ground objects (the rest of the office floor)
>>

>>
>>
>>
>>
File: dr00gz.png (1.1 MB)

1.1 MB PNG
Got a boo boo? This'll patch you up [currently working on medical themed props, pretty satisfied with the results]
>>1018014
>a jacket as good as that
Why thanks!
>There's no arms on the base model other than the jacket, is there?
You mean on the dude's actual body right, like under the jacket? That's correct, there are no arms under it (except for the forearms, there's still some of those left hidden in the sleeves, full hands too, so that I can remove gloves easily if I want to), I was inspired by Bethesda Games' way of handling clothing for their characters
>>
File: Lavabridge.png (3.9 MB)

3.9 MB PNG
Lava Bridge
>>
File: ezgif-8272dcc3c6a98e.webm (1.7 MB)

1.7 MB WEBM
might rig and make the B2 weapons, might not
>>
>>

>>
File: Ballistics Test Sawn Off Shotgun.png (461.5 KB)

461.5 KB PNG
Made some ballistic tests for the shotties we're working on for our gaym, wanted to test shotgun projectile spread and the results were pretty interesting, anything above 5° rotation per individual projectile and the gun won't hit the broad side of a barn
>>
File: Ballistics Test Double Barrel Shotgun.png (531.2 KB)

531.2 KB PNG
>>1018164
0.5° rotation
>>
File: yfjlfyj.mp4 (3.6 MB)

3.6 MB MP4
My submission to a pwnisher style contest between me and my friends :)
>>
>>
File: 08Sep2025-2cropcens.jpg (529.2 KB)

529.2 KB JPG
Tried making a gooner model
>>

>>
>>1018239
I think it would be good even if you stopped now, depending on what you're aiming for
I would add a little bit of motion in the far background, maybe reduce the number of red lights and have them pulse, maybe cloud movement
>>
>>
>>
>>
>>
>>
>>

>>
>>
>>
>>
>>
>>

crunching down the textures for the retrofags
>>
>>
>>
>>
>>
File: 1753732676001067.jpg (157.7 KB)

157.7 KB JPG
>>1018335
I did it that way originally and flipped the normals and it still looked fucked. Then I did it with the modifier and it still looked fucked.
I know the other part is fucked too where I haven't put a seam or anything, but that's not a big deal.
>>
>>
>>1018233
The overhead fan does a lot for the lighting in the scene. Really I think everything it looks like you cared about is done well, simple assets could be more interesting like with the way this guy chops his cutting board should be beat up. But like I said that doesn't sound like your priority.
I think you could add some light under the stockpot, either flames or an emissivie red coil and improve it with that easy enough though
>>
>>1018360
Totally should have done that, the stove in general looks really flat.
>>1018273
Glad you liked it :)
>>1018237
Originally that was the case, but then the knife flip into stabbing the board motion looked too jerky and non-organic if that makes sense? Probably just a skill issue but I couldnt make it look right with cuts going the other way.
>>
>>
File: 2025-09-09 23_36_03-Discord Overlay.png (629.9 KB)
629.9 KB PNG
>>1018363
Working on the character for the next challenge right now, hard surface modeling for the first time in like 600 hours of blender, shit is impossible. The armor is supposed to be inspired by insect chitin plates. Looks too thin for my liking but really not sure how to make it look bulkier, would love any suggestions or advice if you guys got any.
Also tried making a Mignola shader (just a simple color ramp) but also combined it with the bsdf to preserve some of the metallic look of the armor plates, doesnt look the way I want it to. Is there a way to only mix certain properties of the BSDF through mix shader? I want just the roughness and metallic properties.
>>

>>
File: Screenshot_2.png (2.4 MB)
2.4 MB PNG
Look, it's furry Jesus!
>>
File: video (2).mp4 (1.9 MB)

1.9 MB MP4
>>1018239
It's done
Lossless version https://files.catbox.moe/wribv6.mp4
>>
>>
>>
>>
>>
>>
>>
>>
File: 0071.mp4 (1.4 MB)

1.4 MB MP4
Thanks guys
>>1018445
>>1018461
Probably
I started measuring everything correctly, like the computer loosely based on a Macintosh Quadra 700, but then at the end i just eyeballed everything.
>>
>>
>>1018471
I watched several tutorials but all of them were kinda crap and didn't helped to what i wanted to achieve so i just experimented.
I think the key points that make at least this render work is the noise modifiers applied to the freestyle pass so it's not completely uniform, the bloom/glare of course, the tonemapping on the compositor, and being more deliberate with the colors of the highlights and shadows rather than letting the environment/light decide. All the materials is just a basic toon shader (diffuse > shader to rgb > color ramp) with some having some slight adjustements inbetween and chosen colors for the color ramp.
>>
>>
>>1018379
Is the one in the background (presumably, the backside of the foreground one), meant to evoke the nuclear symbol? If so, that's a cool secondary image. Although the pitch black color is a bit distracting. I might lighten it slightly. Over all reminds me of C&C Generals.
>>

>>

>>

>>
File: image.jpg (37.4 KB)

37.4 KB JPG
>>1018534
The sharp, square shoulders clash with the character design and presumable fabric choice, makes for unpleasant silhouette so I'd soften those but still keep the overall "square" shape you're going for.
>>1018535
This is more style critique but imo the head proportions feel a little too squashed and flat on top. It might need a small vertical scale upwards and/or rounding the top of the head in the center like a real head. Quick and dirty resize, I think the happy medium is somewhere closer to yours but slightly taller.
From drawing anatomy, I start with the eyes or the brow ridge roughly on the midpoint between the chin and top of the head for realistic/semi realism. Different styles play with this proportion but it felt a bit too short on the top side in the closeup.
If you analyze faces by making a triangle between the bottom of the lips and outer eye bounds, that triangle is a small portion of the overall frontal facial plane view. The cheek planes are rather large which I think could be balanced out by more mass in the brain case or lowering the eyes/nose a little and scaling down. As they are now, it indicates to our human senses a much larger skull so it looks a bit uncanny although it does indicate the character's presumed personality.
>>
>>

>>
>>1018579
>it is for generals
That's pretty cool. GLA?
>probably cuz the lights were setup at the front of the vehicle
That's almost certainly the reason. You could try to set up a very low power light behind the vehicle. That should lighten those areas slightly without having too much or any effect on the other sides of the vehicle. But truthfully, it's quite a minor issue, and I don't think players of your mod are likely to find it jarring.
>>1018541
Very aesthetically pleasing. Is that a toilet plunger in the bustle? You might consider adding another smoke launcher on the other side of the turret. I would also set the sides of the tubes to smooth shading. Over all very nice.
>>
File: t-83 turet.png (1.9 MB)

1.9 MB PNG
>>1018541
now for the hull
>>1018586
yes it is, it's an asset for a little tank game i'm working on. (thanks)
>>
>>1018567
Genuinely didn't expect that level of analyses. Thanks anon, I'll do another pass over. I'm finding with myself after a while I seem to stop seeing the smaller details, it gets kinda drowned out by the vision, I suppose. So it's good to see this from an analytical stand point.
>>
File: Screenshot 2025-09-13 181755.png (571.5 KB)

571.5 KB PNG
St. Michael
>>
>>
>>1018016
Suggestion: add gauze tape, a couple of dark green prescription bottles. The green ones are much less common than the orange, but are common enough that they my warrant inclusion.
But yeah, I can see why you're satisfied. They all look really, really good.
>>
>>1018586
>You could try to set up a very low power light behind the vehicle
i already have skydome light (arnold) which I presume should've been enough + distant light to add shading that is not just constant lighting
>>
File: 2025-09-16 01_09_54-Discord Overlay.png (1.1 MB)

1.1 MB PNG
>>1018365
Update on my man-spider knight, if anyone got any suggestions or critiuqe im all for it. To do: rivets and straps, body texture, a couple khopeshes, hair has to be re-done and then Its rigging time
>>
>>1018535
tats feel out of place, the character is very minimal with flat colors while tattos are super detailed and have a lot of shading variation, its very obviously a stencil someone put on top, and doesnt feel like its actually in her skin. great job otherwise
>>
File: Screenshot_11.png (145.4 KB)

145.4 KB PNG
>>1018364
If you're still having this problem, maybe try this
>>
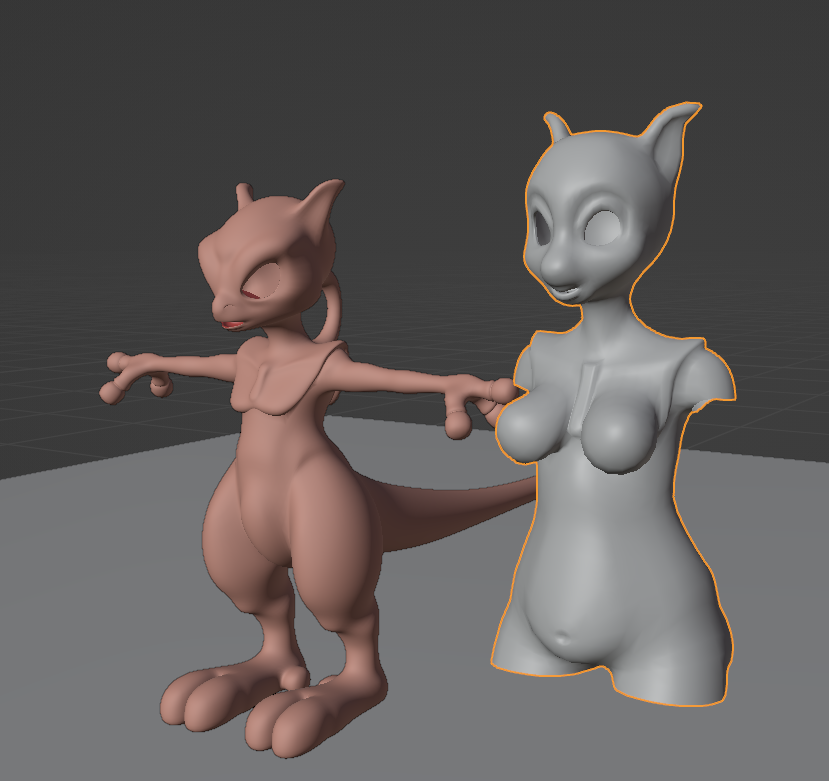
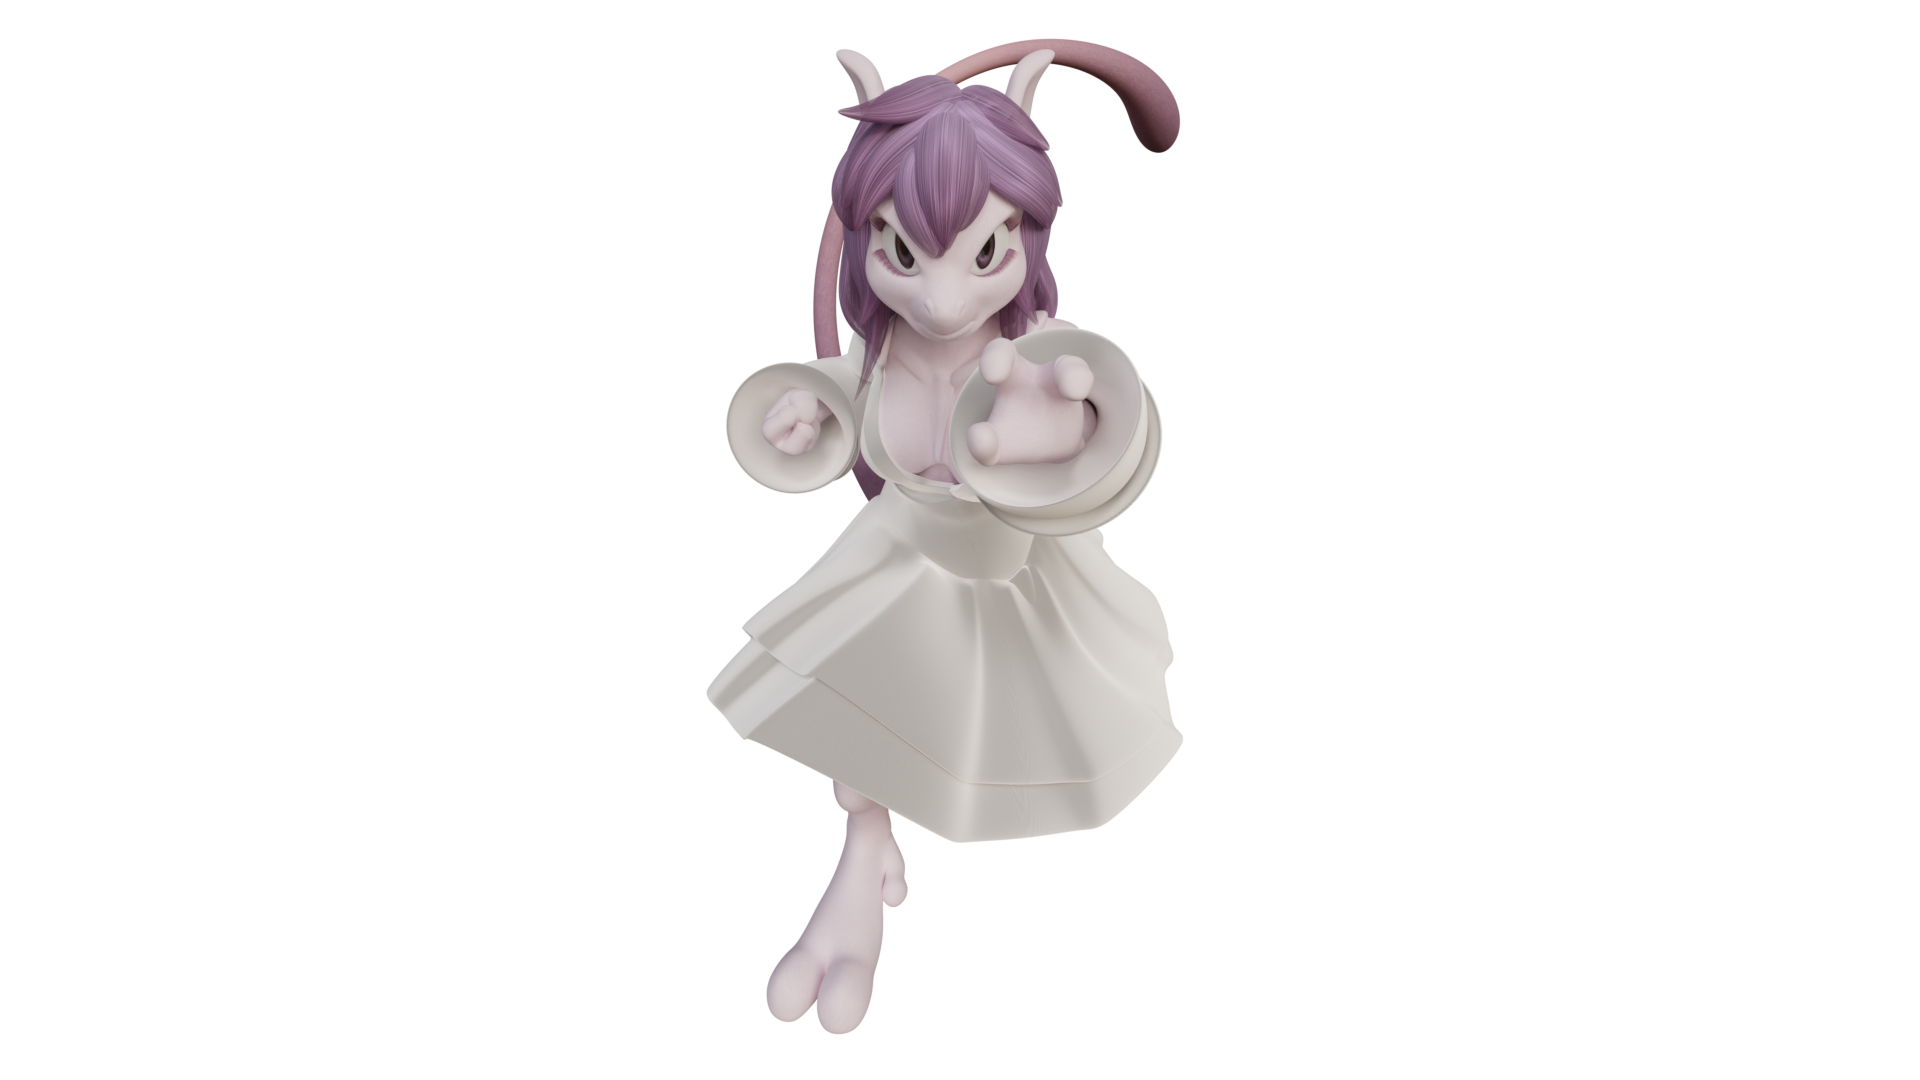
File: 1000007404.png (276.3 KB)
276.3 KB PNG
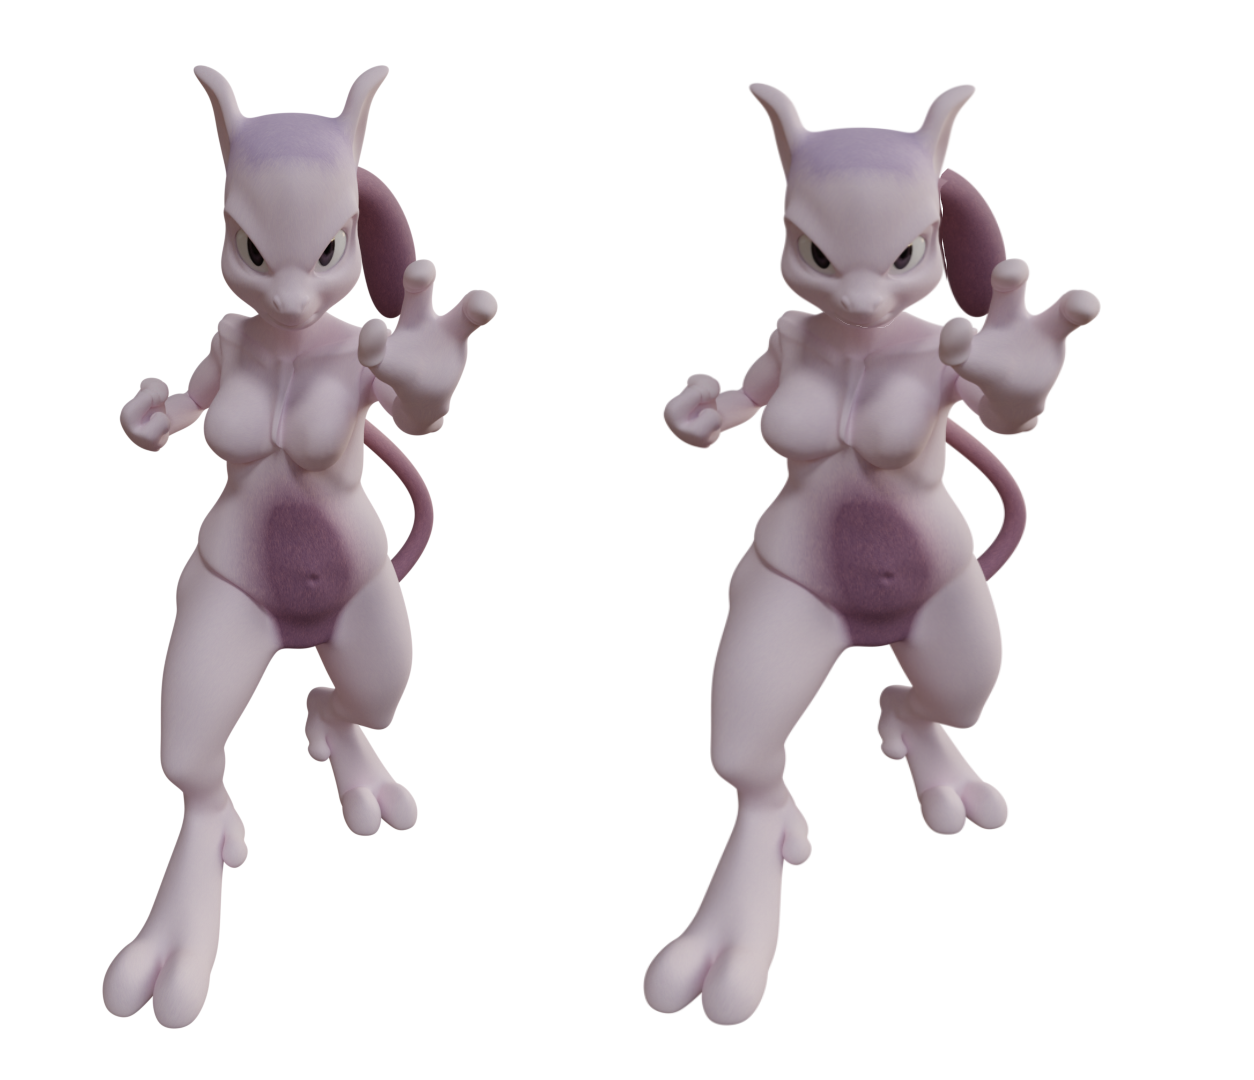
>>1018582
Mewtwo waifu now in progress
>>

>>
>>1018787
Thanks for the suggestion bro but it didn't work. It's okay anyway it's only in the background, but it's the kind of thing I like to know how to solve in case it ever comes up again and it's in the foreground.
>>
File: slaaas.png (1.2 MB)

1.2 MB PNG
I see zie briefcase is safe?
>>1018858
Sure I understand, I did what I could
>>
File: texture WIP.jpg (2.5 MB)

2.5 MB JPG
Trying to git gudder at making depth-based textures entirely in GIMP. It's gotten a lot easier since the 3.0 update since you can make an edit and have a stack of filters update in real time.
The background pattern is completely procedural, being a bayer matrix and maze put through a kaleidoscope, median blur, and bevel. I change the seed on the maze and get a completely different pattern.
I don't think I can go back to nodes or baking autism now.
>>
File: 1000007433.png (248.2 KB)

248.2 KB PNG
>>1018809
>>
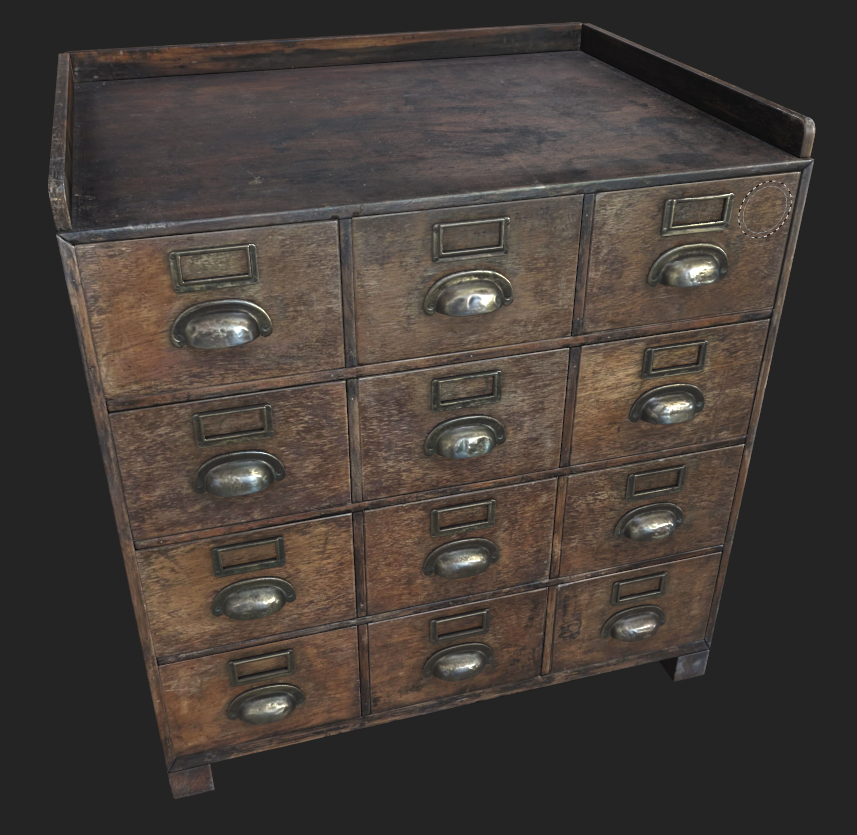
File: a table.png (1.1 MB)
1.1 MB PNG
>>1017627
a table
>>
>>
>>

>>
>>
File: l-fl34.jpg (76.2 KB)

76.2 KB JPG
wip
>>
File: 3ff84e92-2a57-42e8-b55b-0d14c6b2a5bf.png (173.1 KB)

173.1 KB PNG
>>1018962
Head shorter and wider
>>

>>
>>
>>
File: file.png (3.9 MB)

3.9 MB PNG
>>1018887
A bit of progress on this. Getting more comfortable layering normal map elements and also developing this alien-ish style at the same time.
Not happy with how the pipes look... The more in-depth distortion filters in GIMP aren't persistent layer effects so I've avoided them. Might just have to bite the bullet on that part though.
>>1018939
>It's tickling something in my brain that appreciates procedural work and patterns.
A lot of the math involved in procedural generation of patterns and stuff corresponds to physical or chemical phenomena in real life, so there's probably some subconscious tingling in recognition of that.
In any case, it's fun to play with such things.
>>
File: human_justgeo.png (2.1 MB)

2.1 MB PNG
I opened up blender for the first time in FOREVER and I made SOMETHING!
I did it all on one side and then applied a mirror modifier.
>>
>>

>>
>Friend's daughter (she's 11) gets herself really upset when she was doing something on her computer for hours and forgot to save it
>Being the nice guy I am I offered to try and help her get it back
>Against all of the odds it was blender she had been using
>Obviously recovered it and she was elated
>What she had made was actually really decent
>Asked her how long she had been using it
>It was her first time
>She wasn't even watching a tutorial she was reading the (mostly outdated) manual
>She was obviously making mistakes but no more than anyone else when they first start
I should take her under my wing and give her a crash course so she becomes elite shouldn't I? It seems the right thing to do.
>>
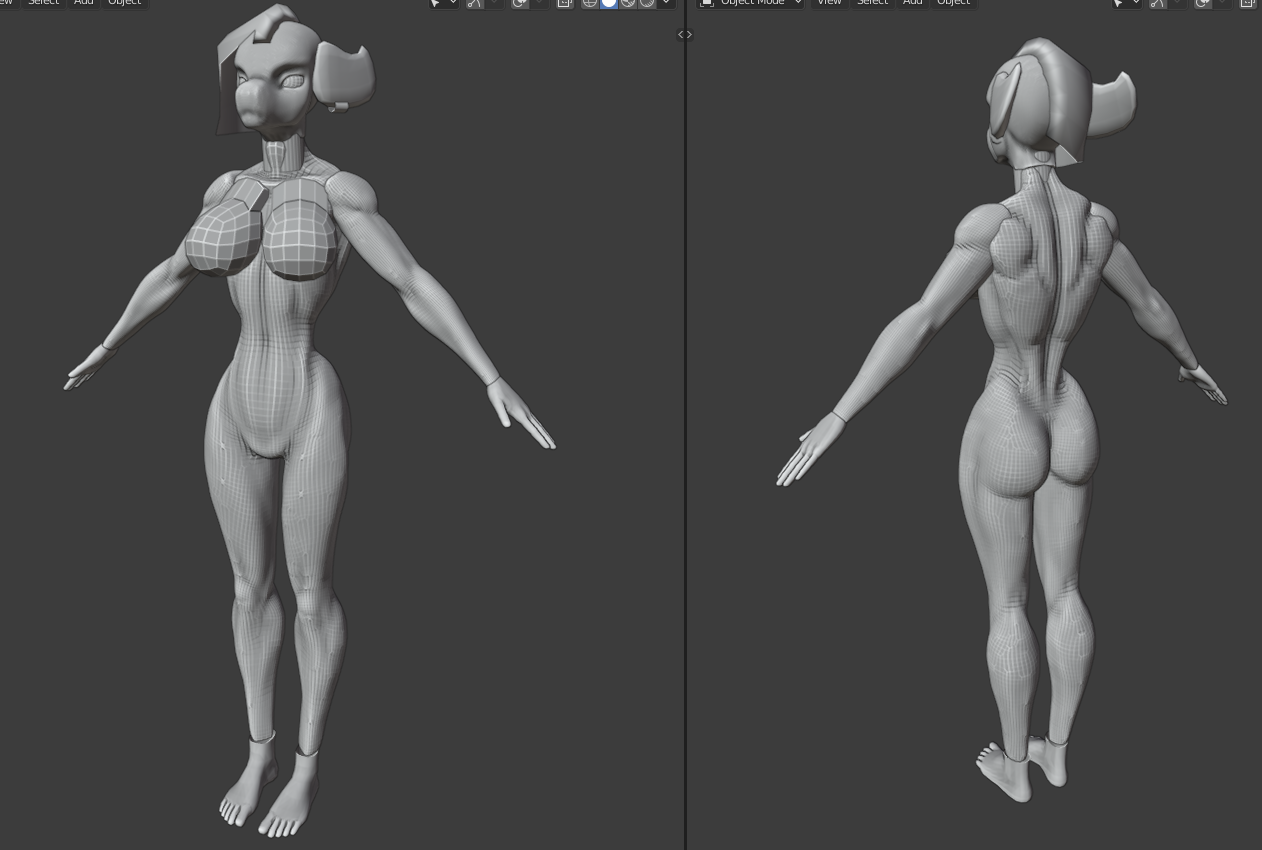
File: Screenshot (175).png (633.6 KB)

633.6 KB PNG
>>1019028
Im using blender, but the same apply on zbrush. I sculpt on a separate mesh the torso and the tits, then I join them and remesh with a hi-density settings to maintain the shape, then keep smoothing and sculping
>>
>>
>>
File: Screenshot (177).png (249.2 KB)

249.2 KB PNG
>>1019080
make it more dense or separate the boobs, and take in note this is for figi production so its going to have some merge but its ok
>>
File: Screenshot (178).png (647.5 KB)

647.5 KB PNG
ok, I think fund a solution
I separated the boobs enough to have a canal in between. Then join and remeshed, and made the boobs poligroups/faceset to control each individually
sorry if is rough but I did it in a hurry
>>
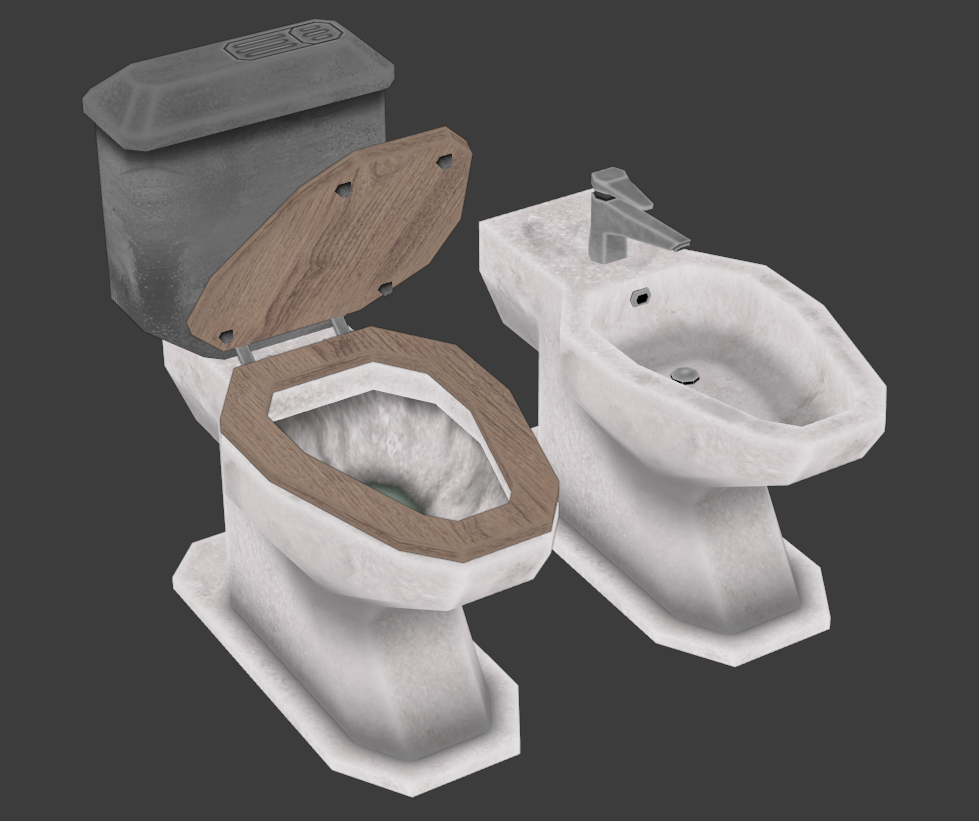
File: DONT SAY THE WORD.png (619.7 KB)
619.7 KB PNG
Shout out to all mah bidet using niggaz out there, REPRESENT
You DO use a bidet right you're not one of those weirdos who goes around with their asshole encrusted with shit, I hope
>>
>>

>>
>>
>>
>>
File: image-39.png (208 KB)

208 KB PNG
>>1019143
aye
>>
>>
>>
File: 851903689867.jpg (3.3 MB)

3.3 MB JPG
wew, managed to set up 3d weaves from pattern images
pretty easy t bh
trying to recreate most of this:
https://www.youtube.com/watch?v=ARobs3F28Hc
the rest shouldn't be too hard
>>
File: mushlady.png (1.5 MB)

1.5 MB PNG
mushroom girl from fobs
>>
File: Screenshot_16.png (801.1 KB)
801.1 KB PNG
WIP
>>
>>
>>
>>
>>1019197
Oh yeah absolutely. I mean we're really good friends, have been for like 20+ years now and she's my goddaughter. All of us are really close. Besides that it's much more likely we would be doing it in the kitchen or somewhere anyway because it's a laptop.
I helped him build her bed once and just that felt uncomfortable being in her bedroom so even I would insist to do it downstairs.
I appreciate you looking out for me though anon.
>>
File: file.png (3.2 MB)
3.2 MB PNG
>>1019173
added a parametric knitting pattern alternative to the weaving and set up the uv deformer. one minor issue i haven't worked out with the uv deformer, but other than that things moving along as expected
>>
File: hp_flashbang.jpg (98.4 KB)

98.4 KB JPG
>>1019194
You remember things over time. You'll get back up to speed faster.
Also I made a flashbang instead of doing anything I'm supposed to be doing. I think it's pretty cute.
>>
I have a bit of a strange question if someone wants to lend a hand.
>Put object in wireframe
>Front view is fine
>Go into the side view
>It's like the object is solid
>Put it into the other sideview
>It's wireframe
It's not just the view that's fucked. If I'm in front view and select two edges (with one in front of the view so it selects both with one selection) then it selects both. In the fake solid view it only selects one, but in the alt sideview where it looks wireframe it also only selects one.
I have reference images and I thought they were somehow blocking something, but I use refs all of the time and this never happens.
Anyone encountered this before?
>>
File: scorpion_mk.mp4 (256.8 KB)

256.8 KB MP4
My first model
>>
>>
>>
>>

>>
>>
File: Screenshot 2025-09-27 084825.png (548.4 KB)

548.4 KB PNG
>>1019219
Done. I guess I have to do real work now.
>>
File: Screenshot 2025-09-28 014002.png (197.6 KB)

197.6 KB PNG
What do you guys think about this cris workflow?
I’m planning to mix a bit of weight painting, for areas like the traps, with the old-school approach from a game like Mario 64, using separate meshes, then tie it all together with a cell shader.
Can’t be bothered to sculpt, retopologize, UV map, or bake normal maps, so I’ll just add more geometry and rely on vertex colors instead.
If the proportions look totally wack, feel free to call it out.
>>
>>1019255
Well we'd have to compare it to the concept art. And I'd like to see fingers and feet first. I've made a lot of models upt to this point and made proportions judgement calls. Then I adds the hands and feet and my perception of the whole figure changes.
>>
File: e8405b02-38ca-473a-8dfc-218565d71ec5.png (476.5 KB)
476.5 KB PNG
>>1019248
As a suggestion
>>
>>

>>
File: Screenshot_20250928_125849_Sketchbook.png (758.5 KB)

758.5 KB PNG
>>1019293
Sure. Even then. The eyes are too tall and narrow. It's your model. You can do whatever.
>>
File: dagger.png (956.6 KB)

956.6 KB PNG
>>1017627
working on a dagger atm
>>
File: flashbocchi.jpg (217.2 KB)

217.2 KB JPG
This and 1 more post for the flashbangs.
>>
File: nadespam.webm (3.6 MB)

3.6 MB WEBM
>>1019319
I wanted to learn how to get the tab swinging in realtime in UE so I tested it out there.
>>

>>
>>
File: Screenshot from 2025-09-29 22-44-14.png (569.3 KB)

569.3 KB PNG
>>1019498
I'm resharing my character
>>
>>
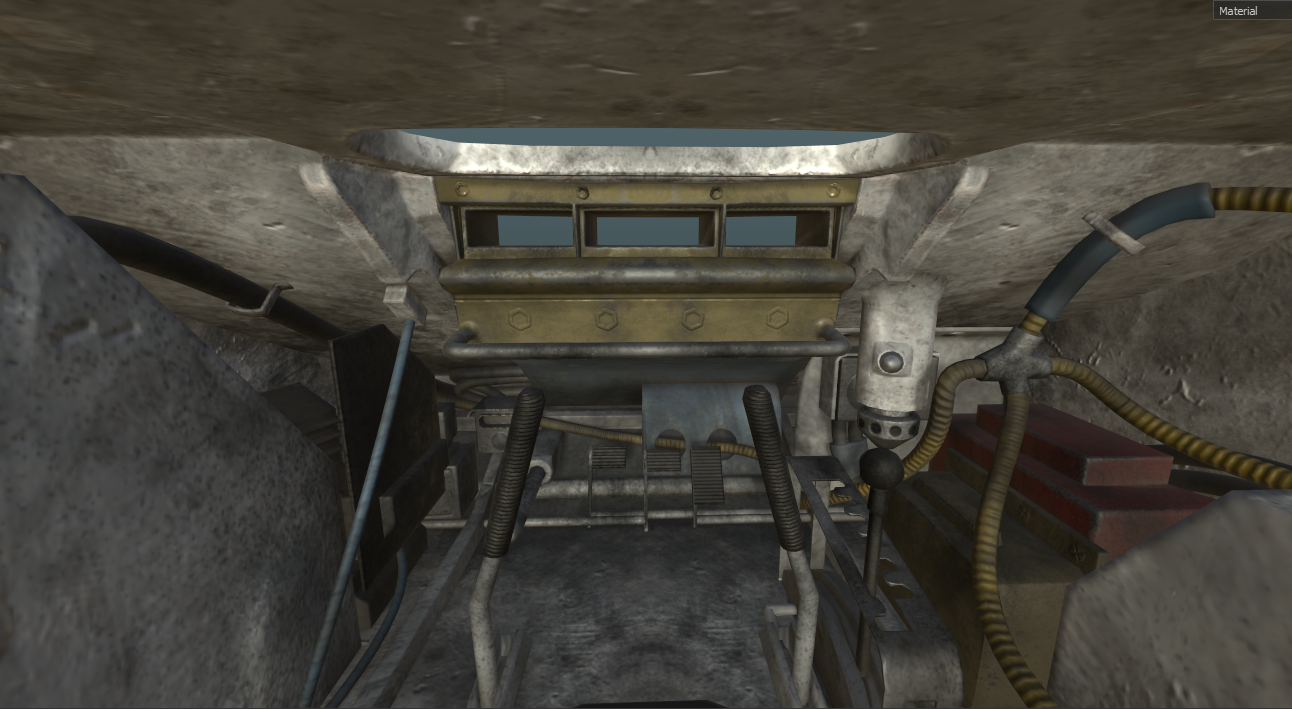
File: interior1.png (1.1 MB)
1.1 MB PNG
>>1019136
now for the interiors... driver's position
>>
File: Screenshot_2.png (1.4 MB)

1.4 MB PNG
Repair kits
>>
>>
File: 027386098717.jpg (2.3 MB)

2.3 MB JPG
added support for holes and quickly swept the curves
had to rework some stuff from earlier to support animation and multiple patterns
performance is reasonable, 5 million points, 31k curves here. take a minute to apply the pattern onto the mesh, but after that it's near/realtime to transfer animations to.
next: general pattern noise, overall fuzz/frizz, width and holes from textures and maybe wrap it up with pattern blending
>>
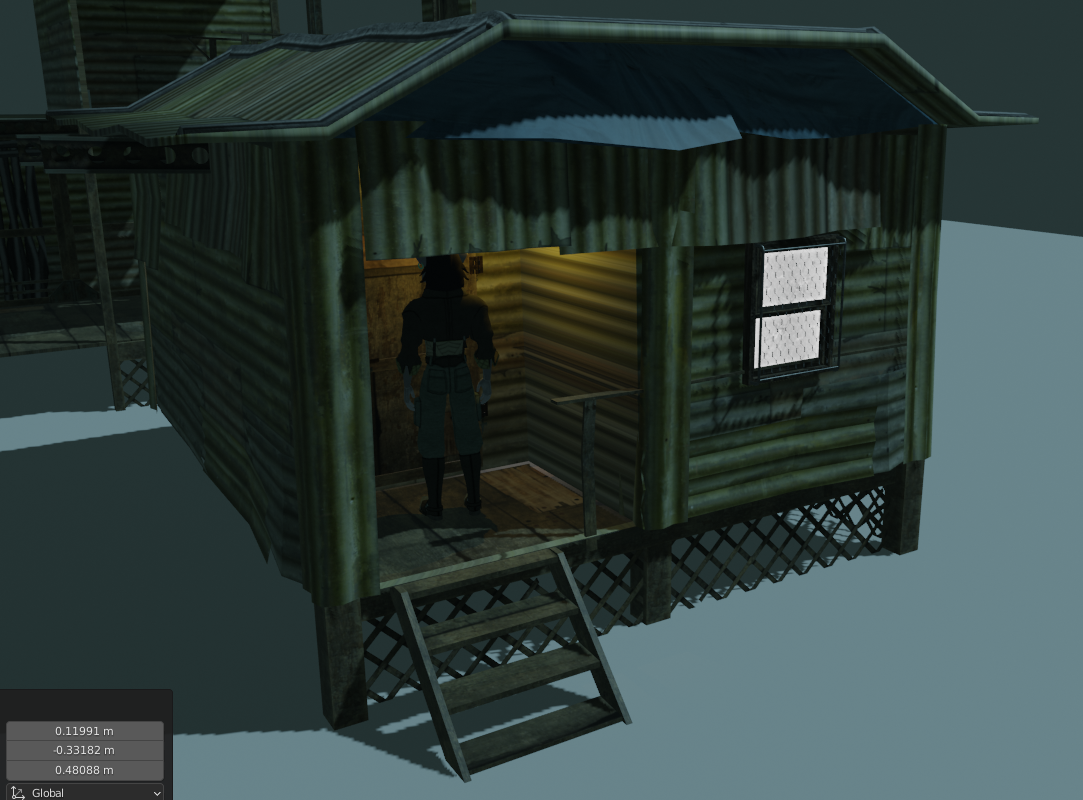
File: Screenshot_18.png (1.1 MB)
1.1 MB PNG
>>1019545
Slum shack WIP
Most likely, interiors will be modular while exteriors will be not, probably gonna make a bunch of unique shack models instead
>>

>>
>>
File: Clipboard_10-06-2025_01.jpg (43.7 KB)

43.7 KB JPG
>>
File: 1000007651.png (997.6 KB)
997.6 KB PNG
>>1019697
Dress test
>>
>>
>>
File: _MConverter.eu_preview.webm (119 KB)
119 KB WEBM
>>
>>1019808
you can definitely do the core effect i.e. copying patterns on to the geometry based on uv space:
https://www.youtube.com/watch?v=RXmS9R-DFTM
only thing i'm not sure about is constructing patterns from images. here's the weaving patterns book if you want to give it a go:
https://www2.cs.arizona.edu/patterns/weaving/webdocs/pb_serrure.pdf
>>
>>
>>

>>
File: 392595072491.jpg (1.3 MB)

1.3 MB JPG
mostly done. just a couple of things to fix, but i think that's the end of my dev blog.
>>

>>
>>
File: aaaaaaaaaaa.mp4 (3.7 MB)

3.7 MB MP4
>>1018674
final render, characters are mismatched, everythings detail level is random, its animated like shit, directed like shit, the corridor looks like something from an UE asset flip but its all because I ran out of motivation to finish it like a week into a four week challenge, still like the kngiht though and proud of myself for gritting my teeth and dragging it across the finish line instead of dropping out
>>
File: kost-new7.png (948.5 KB)

948.5 KB PNG
this entire thread looks liks shit kek, nothing worthwhile as always
>>
File: 802615417401.jpg (132.7 KB)

132.7 KB JPG
>>1019945
thanggs
>>1019950
gj, anon. lotta work and better to finish than not.
>>
File: ed3c47715e6af5de.png (786.6 KB)

786.6 KB PNG
I'm still a newbie but at least I can make decent beds
>>

>>
>>1019960
I don't know how sincere this post is, but it's the reason a lot of people deride asset monkeys. Don't get me wrong, you have skill, but that model isn't very interesting. A lot of you act like you're Michelangelo just because you're good at modeling props.
>>
>>
>>
File: kost-new10.jpg (294.6 KB)

294.6 KB JPG
>>1019979
>that thing looks like it was superglued together.
>no one pays attention to it.
you reek of jealousy there. buddy. have 7 years of experience as an artist.
>>

>>
>>

>>

>>
>>
>>
>>
>>
>>
>>
>>1020028
Yeah, but I don't expect it to have improved in free form modeling. One of the worst things of working with it is creating all the datum and reference lines, etc, which are mandatory. Plasticity is just a million times faster.
>>
>>
File: hole.png (414.7 KB)
414.7 KB PNG
Do you see any glaring anatomy issues with my dirty wh*re, my cockgobbling sl*t, my ravenous h*le, my sleazy *oid?
But seriously, I'm intending to give this female basemesh an athletic build so the fact that muscles are pretty defined is by design. It is idealized especially around the waist area but other than that I'm aiming to keep this body relatively sober, not quite realistic but not extremely stylized either.
I'm noticing the outer thigh is a bit too thin in proximity of the knee so I'm adding some meat there now
>>
File: Screenshot_25.png (518.7 KB)

518.7 KB PNG
>>1020128
>>
File: Screenshot_26.png (383.7 KB)

383.7 KB PNG
>>1020129
Quick 'n dirty skinning test
>>
>>
>>
File: Screenshot_20251014_062237_Chrome.png (843.6 KB)

843.6 KB PNG
>>1020128
Needs a tad more pelvic bon protusion
>>
File: AmbertwoRender1.png (914.6 KB)

914.6 KB PNG
>>1019936
>>
>>
File: 1755057784933840.mp4 (3.8 MB)
3.8 MB MP4
snippet of an animation i'm working on, been very unorthodox as it's my first blender thing and am working with preexisting models as opposed to going from the ground up but it's fun. gonna learn how shaders work eventually so i can do more stylized stuff, although applying it to the models i'm working with will require a bit of reverse engineering
>>

>>
Just started the flipped normals 9 course meal.
Hopefully when I'm done I'll be able to make any character I want and not have it look like shit.
I think most of my issue is attention to detail and basic anatomy, we'll see though.
>>
>>
File: 6020b9e128e87328.png (213.5 KB)

213.5 KB PNG
this is the floridian ass muncher
he muncheson your ass, jerks off to you while your ass bleeds out from flesh wounds and then flees to his home in tampa
he exists for the sole reason of me practicing how to make humanoids and rigging them on blender cause im actually kinda shit at modelling and rigging, might post more pics of him, this one depicts him completely unrigged
>>
>>
>>
File: Hair Mesh Net 01.mp4 (3.2 MB)

3.2 MB MP4
Someone posted a video and paper about creating hair using a basic mesh on /v/. I saw it and decided to try and recreate it. I'm not clever enough to code. But I'm moderately competent at geometry nodes. So I tried my hand at it. Here's a little video.
I managed to get it to function just barely. But I'm excited to get it this far. Because it looks to be possible. I just need to find solutions to a few quirks that are causing gaps to appear. For now, the mesh requires that I mark the bottom and the tops in vector groups. And I have to manually fill in the in between layers with big Ngons. So editing the mesh is a little less than seamless. Still, it's worth those few extra steps in order to get these results. Each strand interpolates inside of the volume of the mesh nearly perfectly.(the Ngons create a slight inaccuracy in position)
And so far, it's very light weight. Creating the volumetric UV only takes a few milliseconds. It takes about 3ms to create 1,000 hair curves. The most expensive part, is calculation to make the points stick to the mesh. That doubles the time. Totaling about 12ms per 1,000 curves. Then, giving the points geometry costs more. About 20ms per 1,000 for the node group I've created. Which captures a bunch of info about the curve. I'm on a shitty PC right now. So it's probably a lot faster for those using a decent graphics card and a newer version of Blender.(I'm using 4.1)
Anyway, I hope I can iron out the remaining problems, because this will make crafting hair a lot easier and faster than even Blender's system of hair nodes. It's so much more intuitive to just move some boxes around, and it automatically interpolates exactly how it should.
>>
File: output.gif (1.2 MB)

1.2 MB GIF
>>
File: Clipboard_10-18-2025_04.jpg (46.6 KB)

46.6 KB JPG
>>1019802
I can show it now. This was pretty quick, I was surprised.
>>1019839
Thanks bro
>>
>>
File: Hair Mesh Net 02.mp4 (3.4 MB)

3.4 MB MP4
>>1020363
Alright. I've ironed out a couple things.
-Cleaned up the UV calculation, so it's more reliable, and there's no gaps. I don't know how well it will fair when the base mesh is too complex. Since it's performed by using a couple of shortest path nodes, and juggling numbers. If the path is too complex, then it might trip up and return the wrong numbers and break. But for now, it's reliably works with basic cube shaped topology.
-I figured out how to automate the creation of internet geometry. Now that I don't have to do that manually, it makes editing the base mesh much simpler.
Adding the automatic internal mesh part, increased the time by another 6ms per 1000 curves. Taking it from 12ms to 18.
Then, expanding the test mesh into a full bob cut added a lot more to the time. Resulting in a total of 30ms per 1000 curves.
This isn't bad, because it means it's fast enough to edit in real time without a noticeable slow down.
In the video, I pumped it up to 15,000 curves. That's only 250ms. Still not bad, because again, I'm on my shitty PC. It would be a lot faster on a real machine.
Adding a couple of shape nodes to give the hair texture, and the node to give it geometry, it totals about 420ms. Just under half a second.
>>
File: Hair Mesh Net 03c.mp4 (2.9 MB)

2.9 MB MP4
>>1020460
Another hair video. You can see my PC really struggle at the end, trying to display 20,000 curves.
I realized the calculation used to bind points was overkill. Removing 3 unnecessary sample surface nodes, increased the speed up by a lot. Reducing the cost from 420 to 250.
The joy of discovering that optimization was short lived after I made this new test hair. It's longer, and curlier. Thus requiring a lot more points. So the cost is a lot higher anyway. Plus, it required clumping, which adds even more time.
The shaping of the base mesh takes a little more work then I initially realized. But it's still overall very simple. This time, I started by forming a quad mesh around the whole scalp. Then extruded out, and added 2 loop cuts. Then used sculpting tools to shape the mesh. Using a mask on the scalp faces to prevent them from moving. the base mesh could be better sculpted, but I didn't want to fuss with it too much just for a test. When the curves are enabled, it covers up some of the wonkiness of the base mesh.
I felt the need to push up to 20,000 curves, because 15,000 wasn't enough to cover the scalp.
>>
>>1020530
is this actually more performant than the existing hair nodes? production grooms are in the 100k curve range. also is this based on on the yuskel papers? i thought the performance gains for those ones came from building curves directly on the gpu and the planes were just used as a cheap way to store groom data.
>>
File: Hair Mesh Net 04.mp4 (3.5 MB)

3.5 MB MP4
>>1020551
>is this actually more performant than the existing hair nodes?
Honestly? I don't know. I haven't crafted a full head of hair using the existing nodes in a long time. I've started a number of times. But get bogged down with all that's required to make those nodes work. Dunno why. They just don't suit me.
For me, this is about ease of use. Doing the base mesh like this settles many issues. Interpolating between curves is perfect. Creating parts in the hair is easy. There are fewer points to manipulates in order to shape the hair, so you're not grooming a thousand parent curves. If nothing else, I'll pursue this further just for the ease of it.
Since I'm on my shitty PC(my good one broke), I can't really tell how fast it is on a real PC.I have noticed that it's *relatively* faster to create points, and then convert points into curves. Rather than create curves first and instance them. So I believe that setting it up the way I did is faster than the typical instancing method most tutorials teach.
>production grooms are in the 100k curve range
With the mesh disabled, Blender handles curves a lot better. Creating 100k curves takes about 1,300ms up front. However, the viewport has no lag when navigated(pic related), and there is only a slight amount of lag when I toggle options. Running the timeline is 1 frame per second however. So I guess that 100k curves would be light work on a real PC. It's the mesh that adds the most amount of time.
>is this based on on the yuskel papers?
Yeah. In the most loosest way possible. I just skimmed and got the gist. Creating the base mesh looked doable.
>i thought the performance gains for those ones came from building curves directly on the gpu
That's right. I don't know how to do that part. I experimented with SDFs a while back and got interesting results. But it didn't scale as well as I wished.
>>1004257
>>1005159
>>
>>1020559
>For me, this is about ease of use.
fair enough. tb h when i first tried out grooming i assumed it would be easier than it is, but the amount of skill necessary is not dissimilar to being a good digital sculptor.
a lot of it just comes down to building an intuition for guide interpolation and that only comes with time. plus, for a really good groom the amount of guides needed is much higher than i initially assumed.
>I don't know how to do that part
i'm not sure you'll be able to really. i don't think blender has anyway for users to directly build geometry using gpu compute. it would probably have to be an external plugin.
houdini did a similar thing with their feather tools recently where the final hi-res barbs get built on the gpu at render time. i've never looked into how they're doing that. houdini does have an opencl node that can interact with geo but i've never tried building geo with it.
>>
>>1020560
This is probably my ignorance speaking. But if there was some kind of nearest sample node for shaders, then I bet an SDF method would be viable. I don't see why we can't tell the pixels of our screen to sample the nearest point of a cloud. But if we could, then I think I could build the rest. I wish shader nodes worked more like geometry nodes with an index to manipulate. I want to believe it's possible, though I'm certain if I brought that up in front of people who know better, they would have a dozen reasons why that's impossible.
>>
>>1020561
i'm only familiar with grid based sdf representations i think the resolution to represent hair would be prohibitively high. not sure how it would be done with a pure mathematical representation. anyhow, good luck.
i'd say have a bit more of a play with the existing hair nodes as well since you can convert the curves you're creating here into guides - iirc there's a node that looks up the nearest surface an adds the necessary attribs for the generation and post processing nodes to work.
>>
>>
>>
File: cycles point spheres.png (216.6 KB)

216.6 KB PNG
>>1020563
"grid based sdf"? Can't say I know what that means. Might look into it later. I'm too tired at the moment.
But if it's how I'm imagining, then I don't think you need a resolution higher than your display. A 1920x1080 display is only 2,073,600 pixels. That shouldn't be too hard to handle. Blender already does what I *assume* is a distance calculation on points. When you look at point clouds in cycles, they're displayed as proper spheres. There must be a way to expand on this. Make the sphere's connect somehow.
>iirc there's a node that looks up the nearest surface an adds the necessary attribs for the generation and post processing nodes to work.
huh?
>>
>>1020566
in houdini we deal with sdf not in their pure mathematical representation, but as vdb volumes. those volumes have a grid resolution. basically you're looking up values for each voxel and the voxel where values transition from positive to negative is displayed as the surface.
re: the points as spheres, i think all renderers i've used repesent loose points this way. i think it's just instancing a very efficient sphere primitive on them. drawing lines between points etc would be more work i'm guessing.
>huh?
https://docs.blender.org/manual/en/latest/modeling/geometry_nodes/hair /utility/attach_hair_curves_to_surf ace.html
>>
>>
>>
>>1020567
>those volumes have a grid resolution
Ah, I think I get what you mean in the general sense. I was just thinking if creating something like that was possible in geometry nodes. Or maybe if it's already possible using the volume nodes. I haven't played with volume nodes much.
>drawing lines between points etc would be more work i'm guessing.
Maybe.
>attach_hair_curves_to_surface
Oh, that node. I might be able to use it. Though, I just tried it, and it didn't work. So I'll have to figure out what wrong later.
I can probably build a light weight version myself. It would probably be more efficient to attach the points before they're converted into curves.
>>
File: blender_jgVfIr7Ma5.webm (763.4 KB)

763.4 KB WEBM
made a new low poly base, testing it out, not sure if i´ll finish them
>>
>>
>>
>>
>>
>>1020968
The approach is an old classic, doing it through geometry nodes is new. Although presumably the paper might have had some interesting contributions on how to generate the mesh, but we don't know which paper that was.
>>
>>
>>1020972
When you instance leaves, instance them according to normal to surface (and rotate geometry in leaves accordingly, to work properly when instanced), it is very noticable a lot of them are randomly floating around not attached to the breanches. Also the pink stuff looks way off. Otherwise, it looks good. Music is nice too.
>>
File: triplehlow.mp4 (2.3 MB)

2.3 MB MP4
Triple H
The child of constraint was acting funny with the water bottle and I had to remove the fluid since I couldn't get it to where I wanted it to go.
>>
File: Hair Mesh Net 07.mp4 (2.4 MB)

2.4 MB MP4
>>1020968
The the other anon said, it's not new tech. Blender devs could have done this a long time ago, but simply didn't want to. Or maybe they didn't even think to. It's neglected tech.
I want to share my node group. But at the same time, I want to make sure it's more solidly functional before letting it out in the world. But if you want to try your hand at making something similar, I would maybe suggest learning Python instead. I got into nodes because they looked easier than coding. But I kept running into roadblocks, because the things I want to create are too ambitious for nodes. If I got into Python instead, I would be able to do more, as Python has greater control over the functions of Blender.
>>1020971
This is the paper:
https://www.cemyuksel.com/research/hairmesh_rendering/Real-Time_Hair_R endering_with_Hair_Meshes-SIGGRAPH2 4.pdf
https://www.cemyuksel.com/research/hairmesh_rendering/
I pretty much just skimmed it a couple times, starred at the geometry images a while, and thought "this might work". The real magic is in the GPU work they did. Which I'm not capable of replicating. They took the information from the geometry, and then build the hair directly on the gpu from that. That's why their method is so blazing fast. I only approximated the geometry part. And not even accurately. Just good enough to look nice.
>>

>>
File: Screenshot 2025-10-19 161441.png (351.7 KB)

351.7 KB PNG
Finally finalized a base model. I like the pure white look, but I'm still unsure on whether I wanna keep that or give em actual skin tones.
>>
File: Screenshot 2025-10-19 133106.png (243.8 KB)

243.8 KB PNG
>>1021026 (Me)
Also, robo drone design based off a paper airplane I made for fun in Church last week.
>>
>>

>>
>>
File: cave troll.png (509.4 KB)

509.4 KB PNG
working on a cave troll for me videogame. Later on I'll apply smooth shading, but now I'm wondering if I should add more detail or move onto texturing.
>>
>>
>>
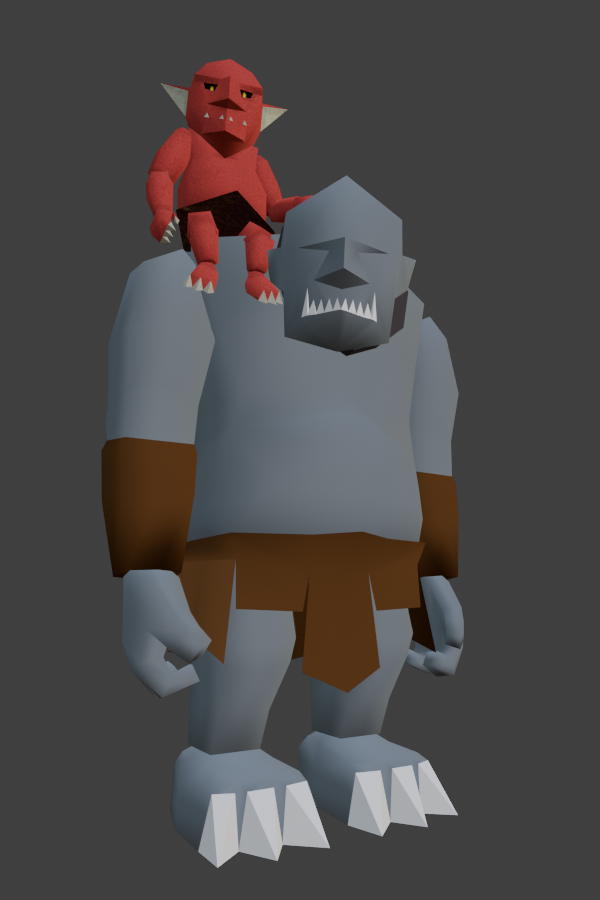
File: gob and troll.png (326.6 KB)
326.6 KB PNG
here's the big guy with the little dude
>>1021090
>poles
I didn't even know what that is until I google it just now lol
>>1021091
>anything that softly deforms
should I worry about them if my model has shoulders and the upper legs separated from the main body?
>>
>>
>>1021093
thanks anon. It probably shows but I'm quite a noob when it comes to this so having people point out those things to me sure is a great help. I'll keep an eye on that tummy while doing the animations.
In any case, how are you supposed to tackle spherical things like a big belly on a low poly model?
>>
>>1021085
You generally want to avoid triangles and stick to quads because triangles interfere with your ability to easily add more detail or loop cuts.
Stick to quads and optimize to tris as the last step. It's quite low poly already and you won't be hurting anything. That said, your topo is actually pretty good for a beginner and not a horror show like most noobs. It's generally fine provided the mesh stays rigid.
>>1021092
5-star poles are unavoidable but they should be kept away from places that deform. A point with 6+ (quad) faces can be avoided and should be retopologized.
Poles are bad for deformation because that means one point is affecting how many faces look and leads to deformation artifacts.
>>
>>
>>
>>
File: Azraelfeasts.png (1.7 MB)
1.7 MB PNG
Girl dinner
>>
>>
>>
>>
File: 1761625327933528.png (1.3 MB)

1.3 MB PNG
My first model.
I did the whole retopology thing then found out I did it wrong anyway as I didn't really account for animation and putting 'loops' in the right places, outside the face.
>>
>>
File: mk_logo0001-0320.mp4 (3.4 MB)

3.4 MB MP4
Logo spin
>>1021222
Spooky!
>>1021250
Good job, anon. Thicc in all the right places
>>
File: 1736783347474208.png (1.3 MB)

1.3 MB PNG
>>1021251
It's amateur hour I know.
I'm ADHD as fuck so I just kinda threw myself into it and now I have to go back and clean up my mess. I learned how to draw years ago so I could just follow a reference images I made myself instead of having to just completely wing it.
I found this video https://www.youtube.com/watch?v=VwNUMIrFCEA&t=279s (specifically that time stamp) and was planning on going back in soon and redoing the topology according to that layout. Does that look about right? Or is there a better way?
>>
>>1021254
Check out the Edge Flow add-on, I have Set Flow bound to the quick favorites on Q.
It's not perfect but it can help smooth out/fix the spacing on some of the edges I see there, make sure you're not deforming the mesh too much.
https://extensions.blender.org/add-ons/edgeflow/
Also looptools enabled and pinned to open, Circle is useful and Space to evenly distribute verts on an edge.
Another useful tool is the Slide/Relax brush in sculpt mode. Hold shift while using that brush to evenly distribute verts, but be careful with the strength/falloff radius.
https://docs.blender.org/manual/en/latest/sculpt_paint/sculpting/brush es/slide_relax.html
https://www.youtube.com/watch?v=Li1IPY6t55Y&t=2m27s
>>
File: images (9).jpg (14.7 KB)

14.7 KB JPG
>>1021250
Love the hyper anatomy.
Id say though that what youre missing is how womens legs are crooked at the knee.
So a normal woman touching her knees and ankles together, her femur will angle inwards substantially and the the tibia is pointeted staight up and down. Its very critical to the female physique. When youre pushing the limits of anatomy you should be sure to have all the other signals shining brightly. I like to exagerate this angle by quite a bit.
>>
File: 1754095313132092.jpg (322.8 KB)

322.8 KB JPG
>>1021255
Damn that brush seems crazy. Will try it out, thanks.
>>1021256
I'm looking up images now. So while a man's femur is nearly straight on, a woman's comes at her knee from a considerable angle.
How best to convey this via vertices? Tilt the verts on the upper leg? Or bring the low leg/feet closer together like pictured?
>>

>>
>>1021266
As far as your verts there's a million ways.
You can select the entire leg below the knee and apply a soft selection that smoothly moves the rest of the leg, and scooch the lower legs closer together
Or, select the whole leg, use a soft selection for this that will smooth the deformation into the butt and pelvis. Rotate the entire leg as the pelvic joint until the knees are touching or the silhouette of the outer thigh is pleasing. Then like before select just the shin below the knee and you soft selection should interpllate across the knee only. Then rotate the lower leg, at the knee, so that it doesnt over lap the other side.
For my taste, when i see a real woman with humungous thighs i notice they really cant bring their knees all the way together. In this case her ankles dont touch and shes a little ligeons toed while standing strait up, with her femur pointing in and her tibia pointing out.
>>
>>
File: 1747617638448933.jpg (313.5 KB)
313.5 KB JPG
>>1021269
Something like this?
>>
>>1021267
Texture critique and worfklow suggestion:
Your textures may be getting too detailed if your models are going to be small on screen. And adding too much detail can take away from the viewer's imagination so it's ok to leave things ambiguous.
You're hitting an uncanny valley of high res textures for low poly models, so zoom out and see what texture details are still visible: the light harpy feathers are visible, but the dark ones fade and the troll textures become gradients/blurred brown and gray.
Filling geometry with solid colors is going to be sharper than trying to paint a texture, so you may want to cut the harpy facial features with geometry and let the lighting engine do the softer shading.
Gradient workflows are great for gamedev and quick prototypes. You can always go back and make a new UV map with more texture detail if you need it.
https://itch.io/blog/797457/optimization-of-3d-texturing-for-mobile-ga mes-definition-of-the-gradient-text uring-process-and-analysis-of-its-e fficiency-and-performance-in-engine
Only warning on this vid, don't scale UV coords to 0 because some engines don't like it and it breaks baking. Just make them small enough to fit in the grid line
https://www.youtube.com/watch?v=4tt3tW1Pz5U
Lastly, focus on the game before the 3D models, animating, and texturing. These models aren't important if you have the entire game to dev and you have to make more assets 3 years later. You might end up scrapping everything you made now since you can't make it consistent in the future.
>>
>>
File: goblin styles.png (265.1 KB)

265.1 KB PNG
>>1021277
Hi anon. Many thanks for the feedback man. Just yesterday I tried picrel while trying to emulate Brightis approach to texturing models (flat colors + a few details). While I think it's a nice approach many anons on the gamedev thread told me that they either prefered it textured or that I should wait and release a demo so people can see the models inside the context of the game, so for now I'm going with textures at least until I release the first demo. Still, I would prefer doing it as you say since at the end of the day it would mean a ton less of work when it comes to UV unwrapping and texturing, which would be nice.
If you want, I can post a video or a screencap of the game so you can see how everything looks.
>>1021270
I hope they don't give me a lot of headaches lol. I'll try to not moving the body a lot so the belly doesn't go crazy
>>1021281
ANON NOT AGAIN
>>
>>1021286
I found a video of the combat. It looks way too early to bother over these texturing decisions, flat or textured wouldn't make a material difference. The designs are what's flat and boring. Look at a game like Flyknight in comparison
>>
>>1021092
Anon, don't about these autists warning you about poles and quads. These concerns have pretty much no relevance whatsoever at the poly count you're working in, and even pixar models exhibit poles deliberately placed in deforming areas.
>>
>>
File: 1760931985100239.png (1.3 MB)

1.3 MB PNG
>>1021307
Needs cleanup but ended up with this. I understand what you were saying now and love it. Really accentuates the hips. I'm not kidding when I say I've seen other art and even real life images of curvy women and asked myself "Damn, what is she missing that they got?" and I think you found it. Thanks.
>>
File: ohwu9lozf7201.jpg (12.8 KB)

12.8 KB JPG
>>1021312
Yes awesome. Welcome. Begin to see the hidden web of little clues your brain latches onto.
You can immediately see how she went from dumpy to beauty.
Keep working on this and keep updating us.
>>

>>
File: Screenshot 2025-11-02 040943.png (254 KB)
254 KB PNG
Nazi boob who is a rude bad dude.
>>

>>
>>
>>
>>
>>
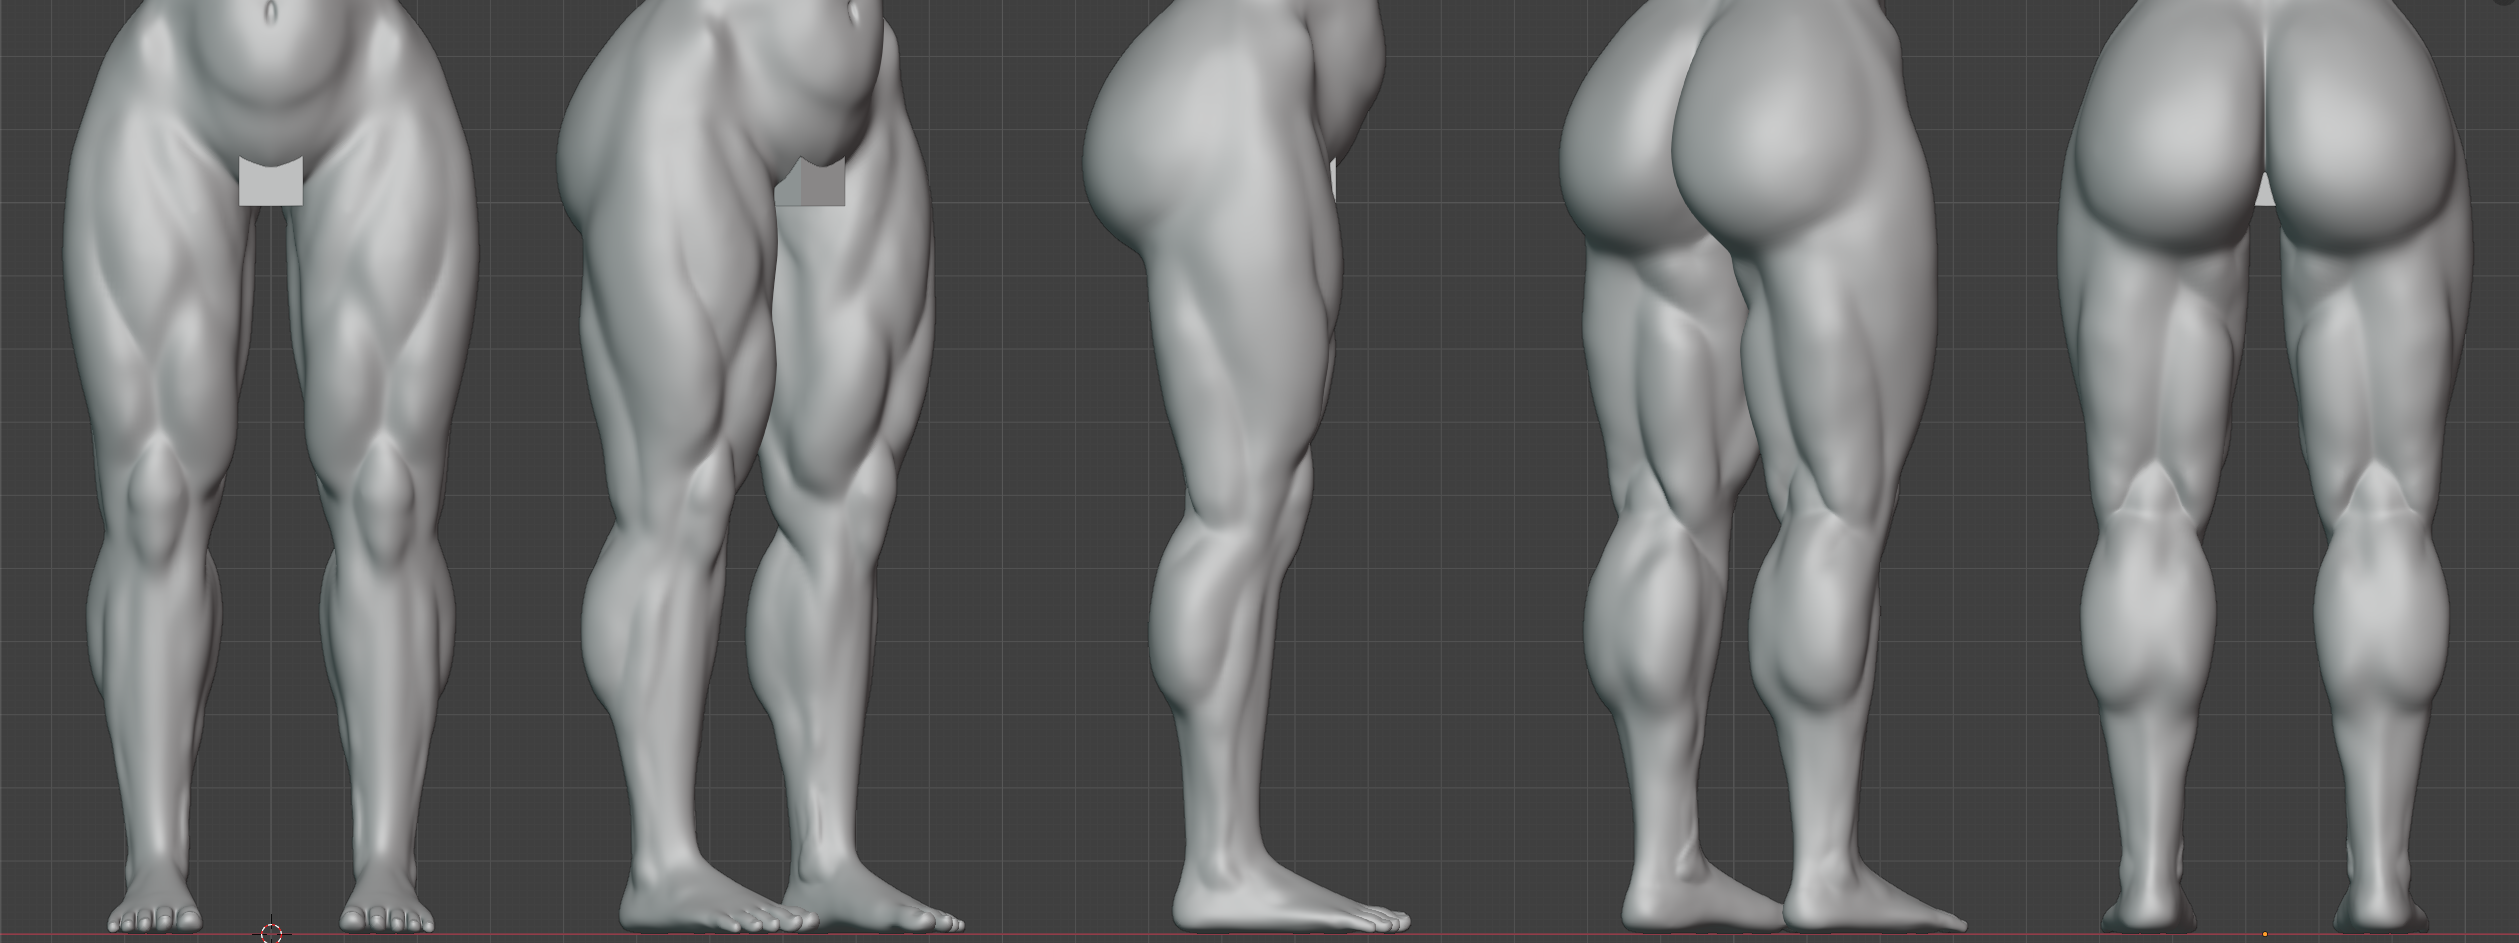
File: Leg Muscles.png (1.3 MB)

1.3 MB PNG
Can any anatomy/muscle enjoyers critique my work. This will be for an anime styled character so I just wanted to get the main leg muscles and scale correct.
>>
>>
>>
>>

>>
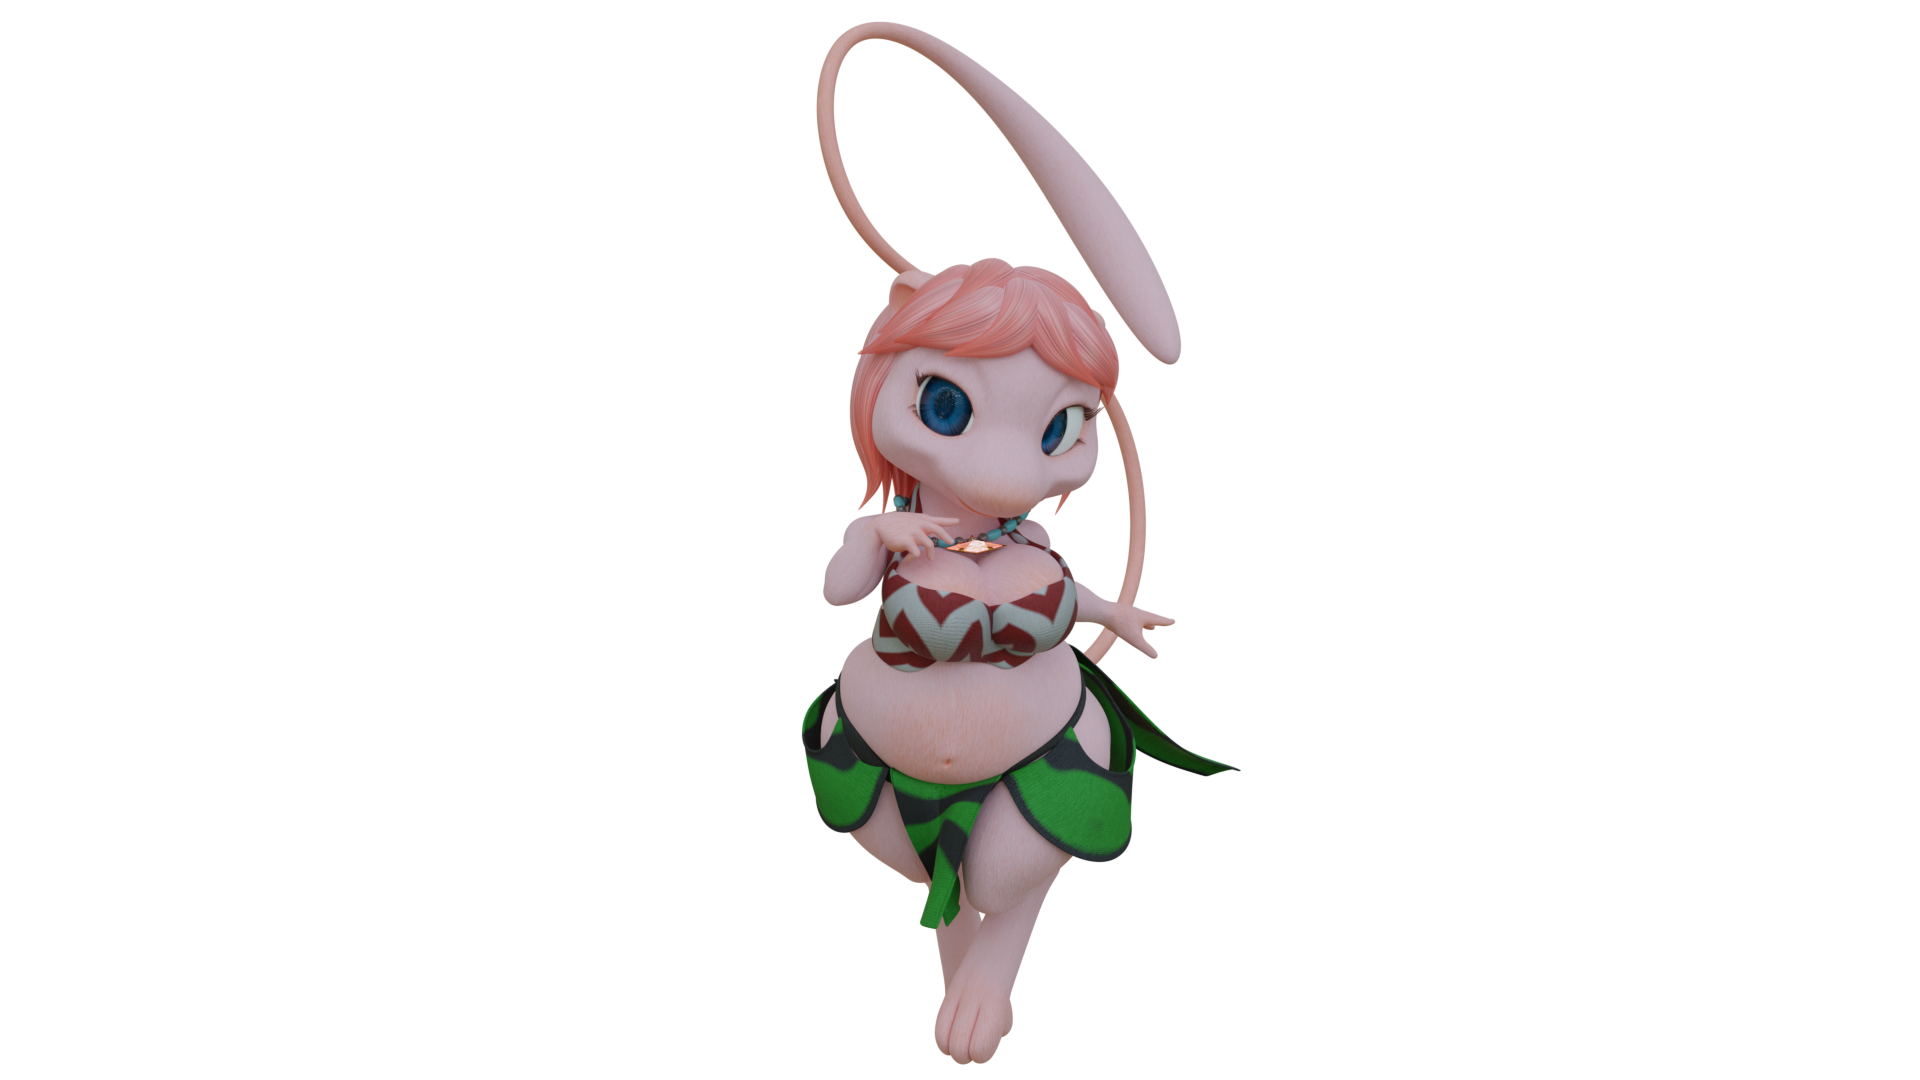
File: catandherbuddy.png (428.8 KB)

428.8 KB PNG
>>1021330
I like the geometry of simple flat hair, but I haven't got ANY clue how to texture it and make it look good yet.
It occurs to me now before I rig her though, I'm gonna need a better solution for eyes, spheres with a simple texture isn't going to cut it if I want to animate different expressions and stuff
>>
>>
>>
>>
>>
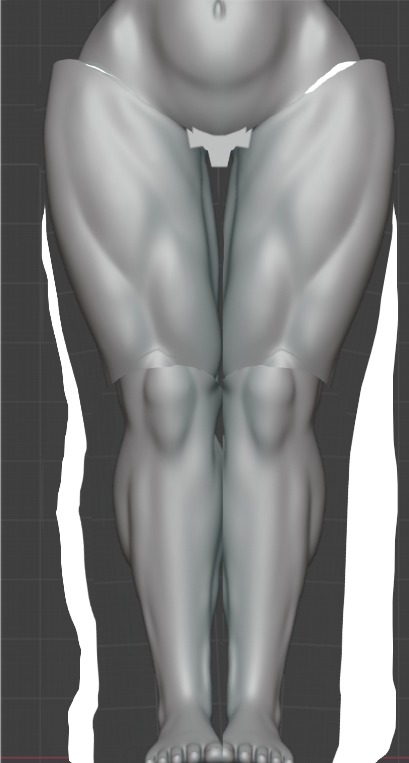
File: Leg Muscles the 2nd.png (1.1 MB)
1.1 MB PNG
>>1021384
>>1021395
Second pass, how'd I do. If you're talking about knock knees I'll handle that with the rig.
>>
File: Untitled-1.jpg (347 KB)

347 KB JPG
>>1021428
try something like this. you should def spend more time sculpting characters before learning retopo and rigging if you want to get good fast
>>
>>
>>
File: Screenshot_20251104_080747_Sketchbook.png (169.4 KB)
169.4 KB PNG
>>1021428
>I'll handle that with the rig.
If that's your personal choice, ok. Dont forget though.
>>
File: Clipboard_11-04-2025_04.png (1.6 MB)
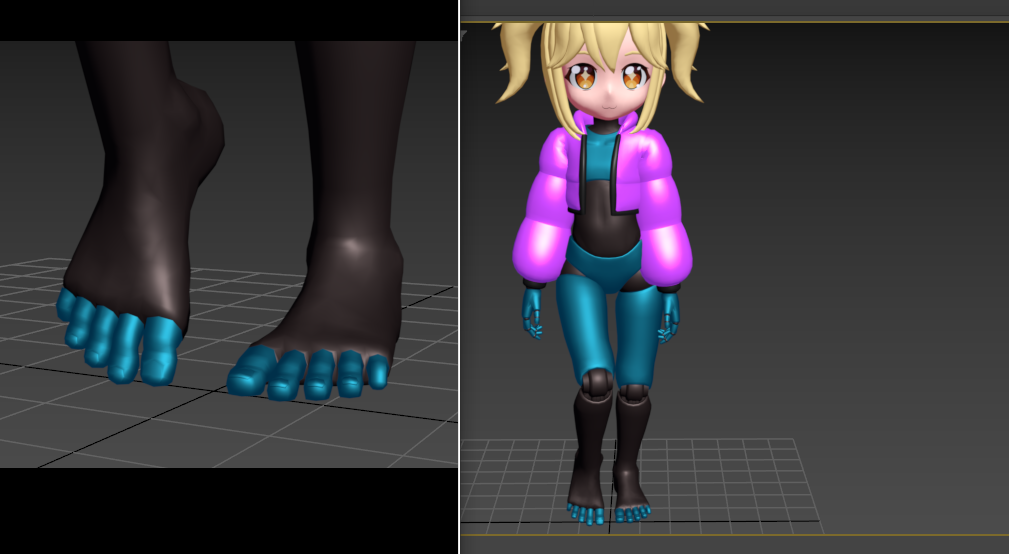
1.6 MB PNG
Trying to make feet
>>
>>
>>
>>
>>
>>
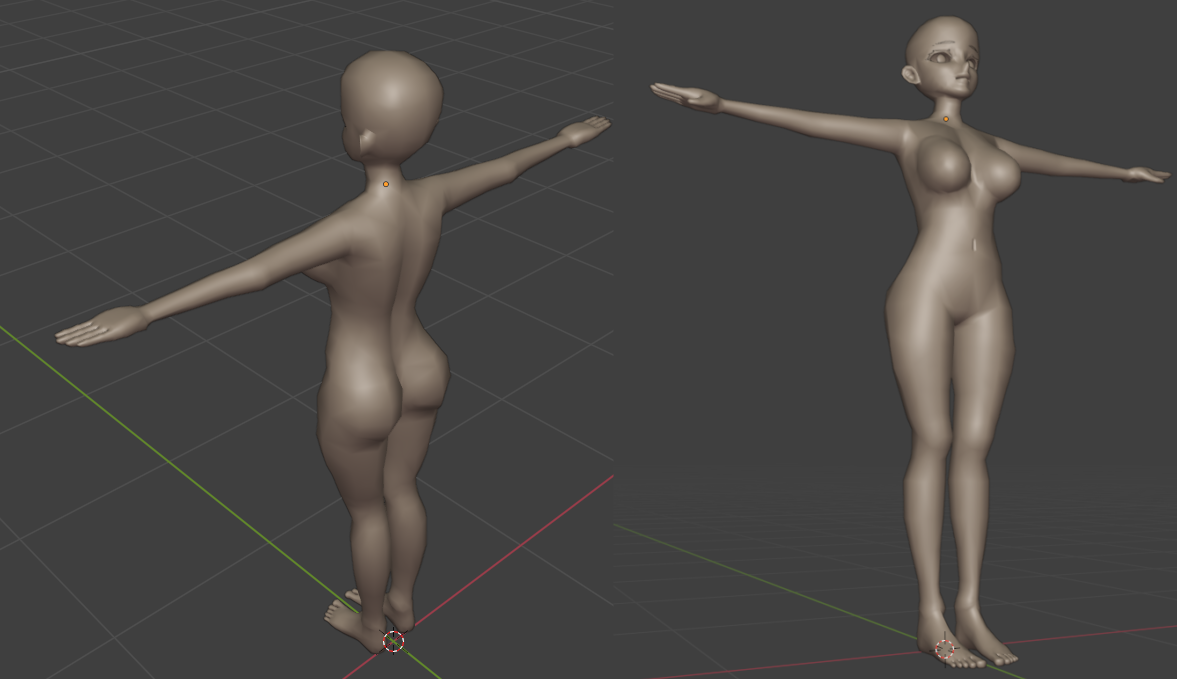
File: 534345345345.jpg (137.9 KB)

137.9 KB JPG
>>1017627
I feel like my proportions are still a bit off
>>
File: 0000-0161.webm (2.2 MB)

2.2 MB WEBM
>>1020290
Ty.
>>1017767
I think I got something working for the scapula as well, same concept of measuring the compression of a bone but this time for x4 directions (up/down/forwards/backwards), and in two places, because sometimes the movement of the shoulder negates what the arm does to the Scapula. Compression/stretching gets translated into sideways motion, a little rotation and protrusion. The concept is simple but the hardest part was first finding a good average point between the arm/collar/chest bones and then adjusting based on compression/stretching.
When the arm moves forward but the shoulder stand still, the scapula protrudes.
When the arm is forward and the shoulder moves forwards, the protrusion is negated.
When the shoulder moves back, the protrusion is negated again.
When arm and shoulder move back the scapula wants to follow that rotation, but the muscle/tissue compresses and mass creates a small but different protrusion.
I need to see now if I cant simplify this somehow, some things seem redundant so I might try and see if I cant get the same results with less bones.
>>
File: WIP Model Nov.png (300 KB)
300 KB PNG
>>1017627
WIP of a fan model I was planning on creating.
>>
File: file.png (127.4 KB)

127.4 KB PNG
>>1021449
>>1021447
>>1021451
Thanks, not sure about a game. I would welcome the money though.
I think the feet are done but now I'm thinking sneakers would be better lol, not sure why I modeled feet, was just trying stuff I guess. I also modeled the eyes instead of using a texture.
>>

>>
>>
>>
>>

>>
>>
File: Clipboard_11-07-2025_06.png (2.3 MB)

2.3 MB PNG
>>1021506
Haha maybe sometime, right now I'm just focusing on other stuff.
Modeled a new head.
>>
>>
>>
>>
>>
>>
File: 561_04.png (1.9 MB)

1.9 MB PNG
Learning new modelling modifiers in blender doing the Caudron C. 561. This aircraft has an infuriating lack of reference images which is causing me to slowly hate going anywhere more detailed with it